How to Change Color in After Effects: Adobe After Effects Tutorials
How to Change Color in After Effects. You all know by now that the video professionals that normally produce the beautiful After Effects templates that you can purchase at TemplateMonster are kindly sharing their priceless After Effects experience.
This time it's going to be about how to manage the colors of the video effects you work with. And there are two difficulty levels presented here - Basic and Advanced. Enjoy!
Basic: How to Change Color in After Effects
1. Tint
This effect transforms full-color image into a two-color one. You should notice that all dark tones will have color #1 and light tones will have color #2. Using white fractal with transparent background will give opportunity to change the color of the one-color animation into anything you want.
As you may know any parameter that has stopwatch icon could be animated. Tint allows color animating – it means while animation will played the color may be changing. By changing the amount parameter you can tint your color (by setting 30% value for this parameter).

(click the image to see the full size)
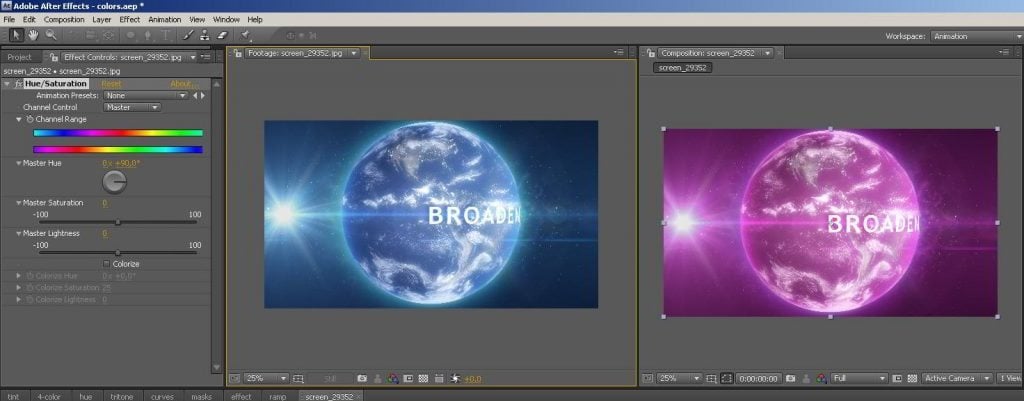
2. Hue/Saturation
The Hue Master will shift all your colors – it means that changing the hue value will shift the color scale (this scale shows what color will correspond the old color in the image).
(click the image to see the full size)
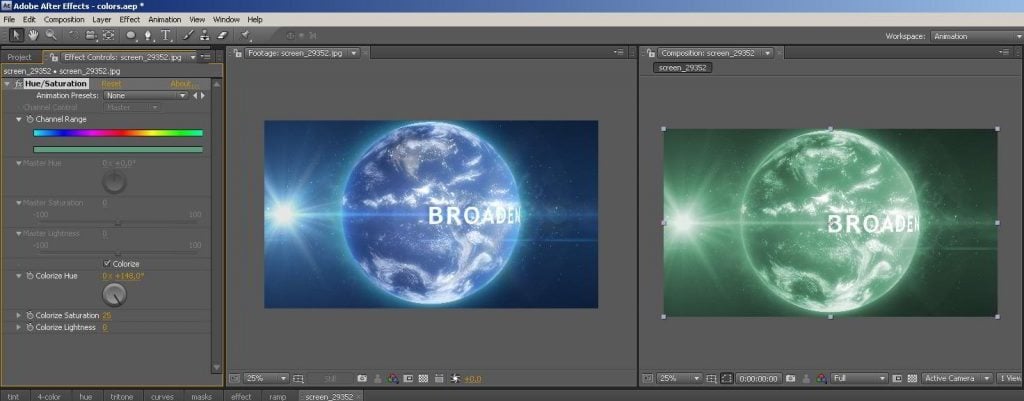
By checking the Colorize box you can turn on three options from the bottom of a panel. Colorize value creates one color tint effect similar to Tint. The Range channel shows the current tone color. Please note that this function can not be applied for black and white colors.
(click the image to see the full size)
Here is a tip: by moving Saturation Master to -100 you’ll receive grey-toned image.
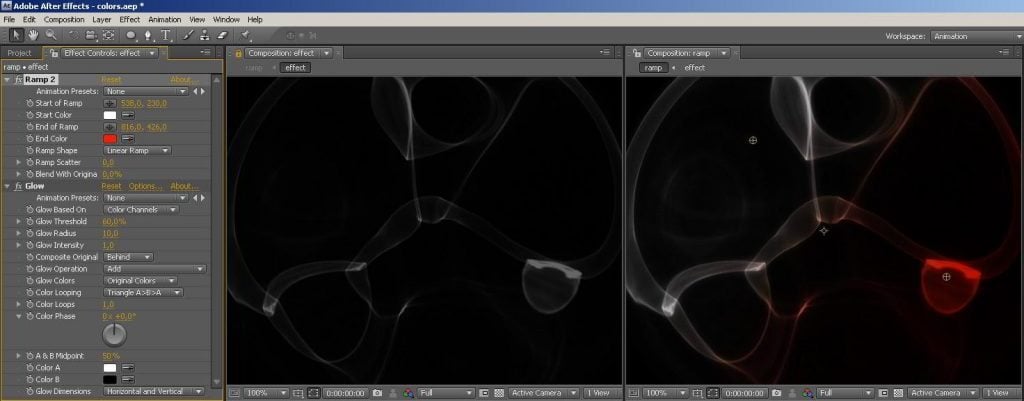
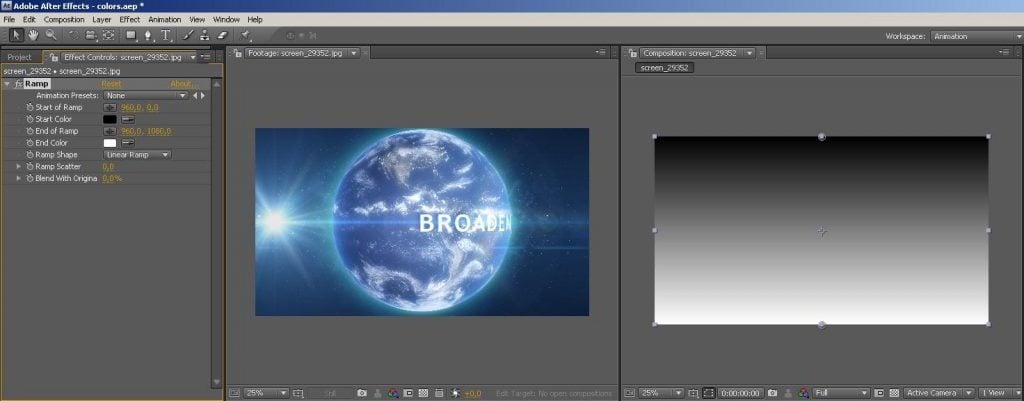
3. Ramp
Ramp allows overlaying gradient over the one-color image with transparent background.
(click the image to see the full size)
If you want to overlay Ramp to a full-color image than the whole image will be replaced by gradient.
(click the image to see the full size)
You can control the color and the start/final position of the gradient. Also you can choose between linear and circular gradient types. Unfortunately this gradient can be only two-colored and this is the main Ramp’s drawback (but we will show you how to enlarge color palette for the gradient).
Here is another tip for you: if you want to make smooth color transitions you should set the value of 16 bpc (click Alt+left mouse at “8 bpc” icon in the Project panel).
4. 4-color gradient
4-color gradient is a really creative plugin that has overlay modes.
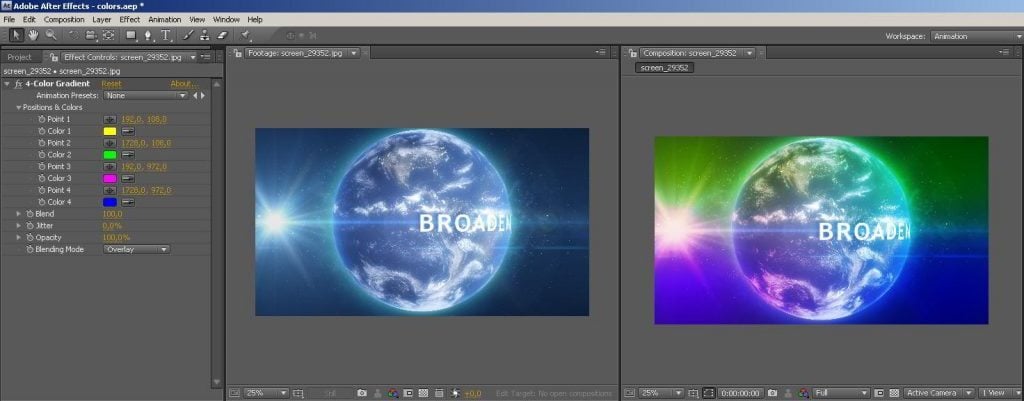
(click the image to see the full size)
This example shows blending mode and you should know that you can pick colors at kuler.adobe.com. This plugin allows copying colors from the website and pasting them in hex format.
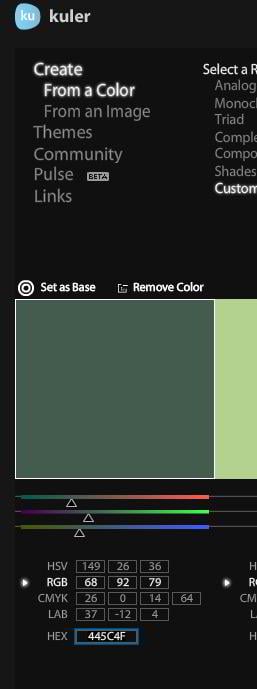
(click the image to see the full size)
This is a kuler with digital data fields in hex format.
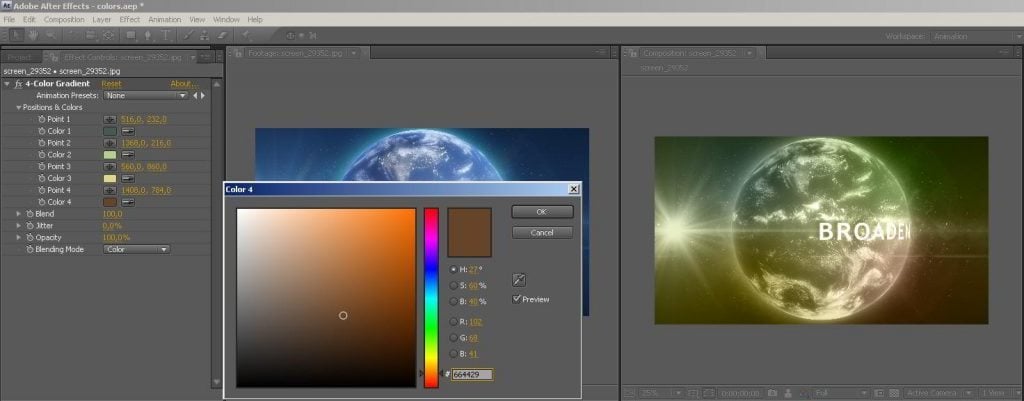
(click the image to see the full size)
This effect contains color values that we’ve created using kuler.
5. Tritone
Tritone is an effect that similar to tint, but it has 3 colors and nice presets. It recolors light, dark and halftone areas.
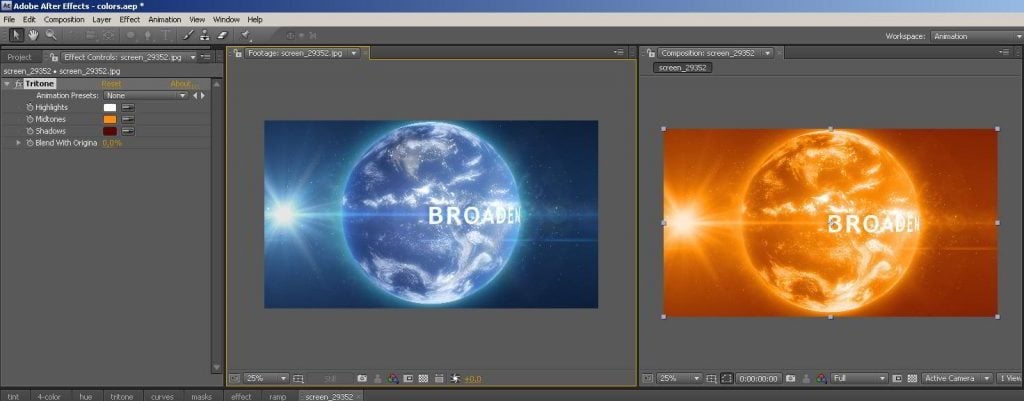
(click the image to see the full size)
Advanced: How to Change Color in After Effects
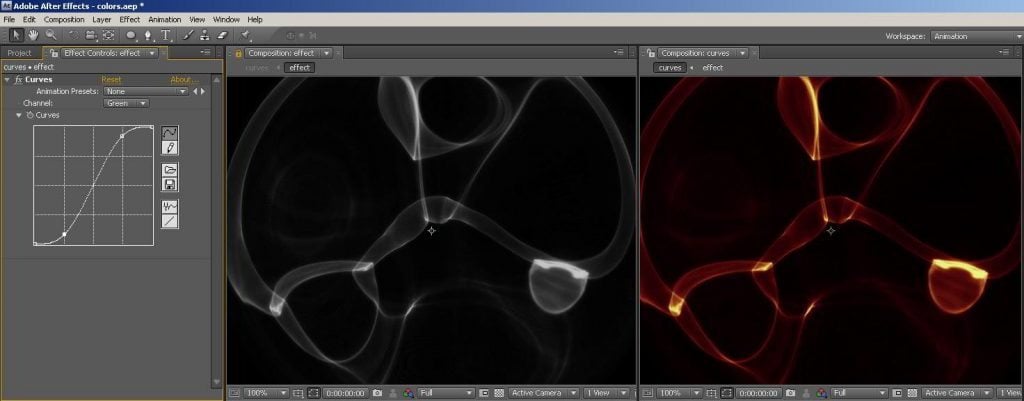
1. Curves
This plugin is useless for white effect with transparent background. So you should make your background dark for more spectacular result – it means that you have to underlay dark background under the transparent one. We have black solid over transparent effect inside the layout.
If you want to adjust the colors you have to change curves separately in each channel (Red, Green, Blue).

(click the image to see the full size)

(click the image to see the full size)
(click the image to see the full size)
Also you can apply this method (channels adjustment) to any video or photo to get really interesting result.
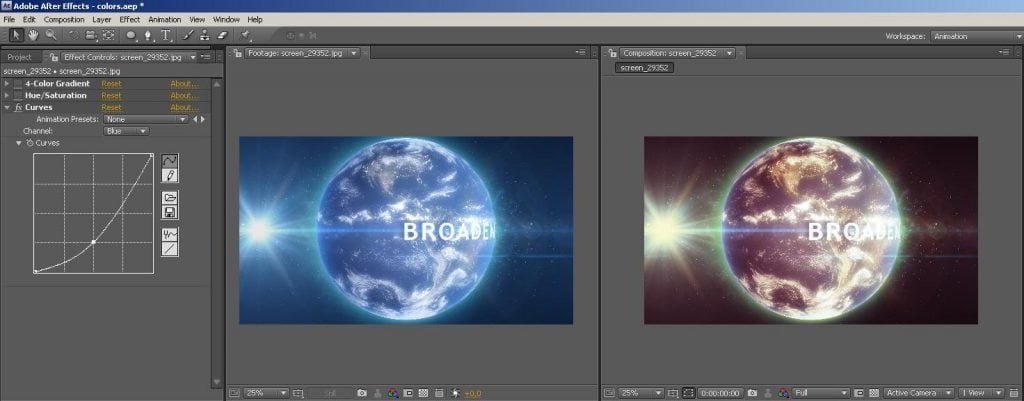
(click the image to see the full size)
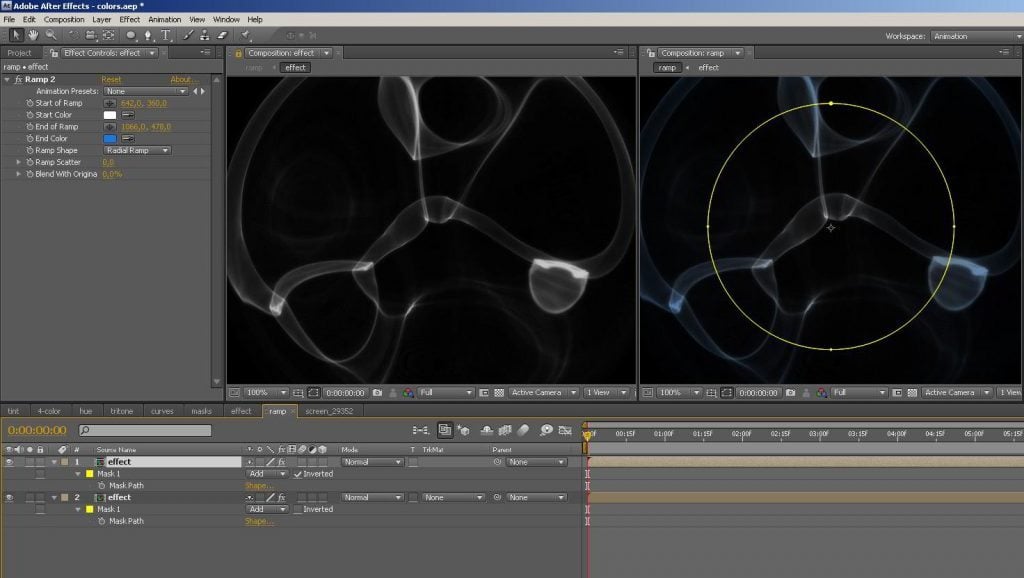
2. Creating a tricolor radial gradient

(click the image to see the full size)
Now we overlay radial ramp over the white effect with transparent background. After that we put white color in the center and cyan from the outside. The next step is drawing a round mask with blurry borders from the center.
(click the image to see the full size)
Now you should duplicate the layer and invert the mask.

(click the image to see the full size)
Next is we must change the color of the duplicated layer into green. In case you need it, you can adjust radius and end colors position with the help of the mass.
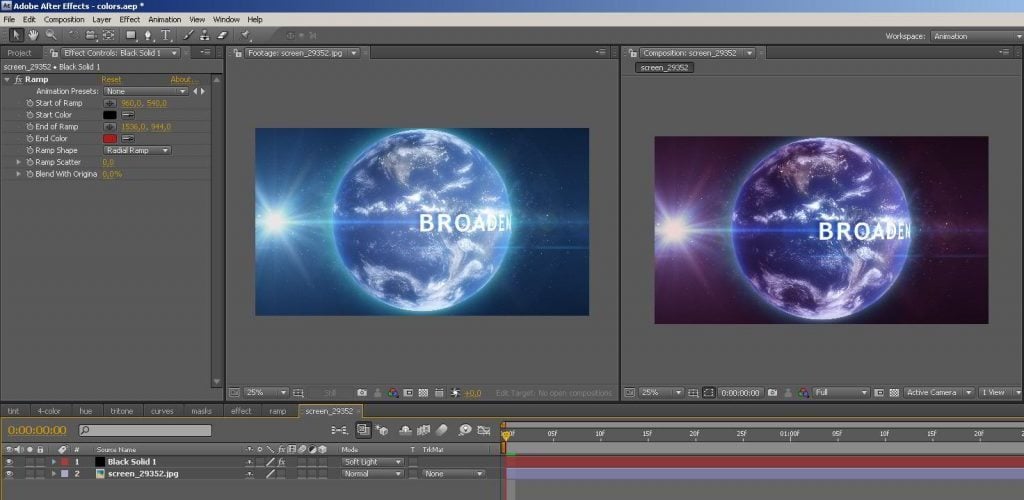
3. Advanced Ramp
Now we will apply Ramp effect to solid.

(click the image to see the full size)
After that we put layer with ramp effect over the image and make Soft Light overlay mode.
(click the image to see the full size)
Voila!
Top 10 After Effects Templates

Edward is a professional technical writer who is also passionate about making stunning designs in Photoshop. You can find many useful tutorials in his collection of articles at MonsterMost.
Get more to your email
Subscribe to our newsletter and access exclusive content and offers available only to MonsterPost subscribers.

Leave a Reply
You must be logged in to post a comment.