CSS and JavaScript Tips for Designing Efficient Forms
Why are website forms so important? Logically enough, forms play a crucial role for the website conversion, and therefore impact the project success indicators on the whole. Having some basic knowledge of HTML, you'll find it pretty easy to generate a standard form.
But it's not as easy to design and style your website form to make it look exquisite and be easy-to-use and accessible for all users at the same time. Hopefully you'll find the article valuable while designing and coding website forms.
Most of web forms are known to be created with PHP, because it is an open-source coding environment which works perfectly with all major browsers and is widely available. But we shouldn't stay too conservative and consider the other back-end coding options like ASP, Pearl, Ajax and JavaScript as well as advanced CSS properties to diversify the form appearance and functionality.
Generally, any web form acts in two ways: it generates an email or works with a database. The first rule while working with forms might be to avoid "re-inventing the wheel". There are tons of open source services for generating the necessary codes and make the form do what it is supposed to do. One of such solution is Web Form Factory and is available for free on the Internet.
Wufoo is another popular option to make the web form creation an easy and painless task. They offer the creation wizard both for free and for the fee. But their prices are quite reasonable for such an efficient way of forms implementation.
Make Use of <Fieldset> And <Legend> Elements
It's always good to group the related fields together, especially if you generate a lengthy form and require additional usability. The form is to be divided into separate manageable visual components.
The elements like <fieldset> and <legend> are the options to provide such a structuring for your form. The <fieldset> element features a border by default and you may just change or remove it within CSS.
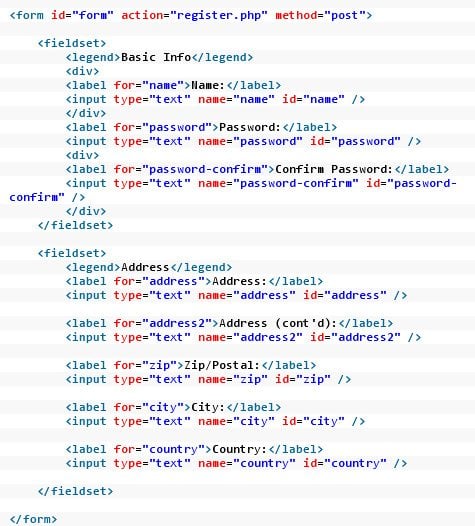
You may group several related fields of a single form using <fieldset> and <legend> elements exactly like in the piece of code below:
label {

float: left;

text-align: right;

margin-right: 15px;

width: 100px;

}
***
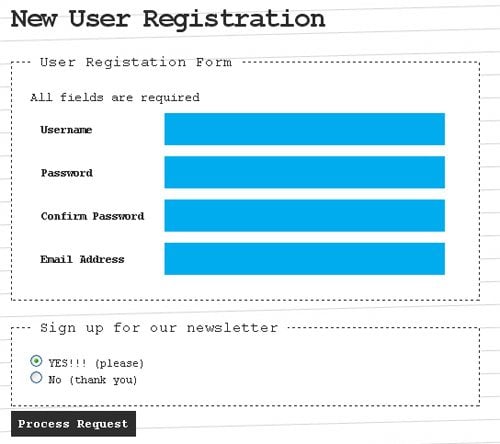
The <label> element is aimed at attaching descriptions to input fields, textareas, radiobuttons and other form elements. The <label> element helps to focus or select the element it describes after clicking on it with the mouse. This allows to structure the form clearly to achieve the table-like format without actually using a table. Descriptive information may be attached to the form elements by setting a static width, floating it the left, aligning the text to the right, and giving it a little right-margin. Looks quite decent.
The following example extends some general initial form to include <LABEL> elements:
<FORM action="http://somesite.com/prog/adduser" method="post">

<P>

<LABEL for="firstname">First name: </LABEL>

<INPUT type="text" id="firstname"><BR>

<LABEL for="lastname">Last name: </LABEL>

<INPUT type="text" id="lastname"><BR>

<LABEL for="email">email: </LABEL>

<INPUT type="text" id="email"><BR>

<INPUT type="radio" name="sex" value="Male"> Male<BR>

<INPUT type="radio" name="sex" value="Female"> Female<BR>

<INPUT type="submit" value="Send"> <INPUT type="reset">

</P>

</FORM>
Put Focus on Form Elements
It's desirable not to break your default styling. The evident advantage of this is that you may get rid of the unwanted borders around objects that you didn't mean to be there, but what's also evident is the fact that you break the default styling for the input buttons in Firefox.
You may put a focus on the clicked elements by simply applying some styling to the text and input areas that come into effect right after the user click into the area. Just use the :focus pseudo class for this purpose:
textarea:focus, input:focus {

border: 2px solid #900;

}
Add Some Jazz To Your Forms
Use JS solutions and advanced CSS properties to make the form look more stylish, inviting and not boring. People like them, especially if they're associated with your overall corporate website design. Below is a couple of awesome ideas to make your forms outstanding.
Create Rounded Borders for Input Fields
The most popular method of making rounded form fields is using sliding-doors technique, Form Solution or Nifty Cube (JS solution). It will make the desired effect with a less fuss required on your part and runs quickly.
Or you could simply apply a piece of code in your CSS3, adjusting the border radius :
-moz-border-radius:44px;

-webkit-border-radius:21px;

border-radius:44px
That will work on all popular browsers except for Internet Explorer. The W3C CSS validator may tell you that it's invalid. But you should simply ignore the caution, it is valid and works fine.
The other way is applying the image to the background of your header container, pushing the background pic to the bottom of the element and applying a background color which best matches the top of the new image. While the padding from the body element is being removed. Apply some padding (e.g. 10 pixels) to the top, right and left sides of the ul.
You may also want to delve deeper into the issue and read about the usage of rounded corners for text inputs, select boxes and text areas. We'd recommend you the Rounded Corner Form Elements article in this case.
If you add a gradient background to the input fields, your form will pertain nice three dimensional look. Adding a gradient to your form is possible by using an online tool to create a gradient .png file and then adding it to the style as it is described in the Adding a Gradient Background to Fields tutorial.
Change Text Links to Images
Replacing default HTML links and buttons with your own stylish images is a way to individualize your web form design. If you use details, edit or delete options in your form, they generally appear as simple hypertext links, and you may add some charm to them by replacing text links with small cute icons like it's described in another Caspio Bridge tutorial. Or at least use Google web fonts or Cufon to make the text look better.
Create glossy heading texts with the following tutorial and give the form a clean and professional web 2.0 style.

JavaScript Library Plugins for Forms
Fancy, eye-catching, cross-browser radio buttons, checkboxes and other Select Elements - all of this is made possible due to the various JS library plugins and code out there.
For instance, feel free to check out the jQuery Image Combobox – a flexible, image-based replacement for the standard <select> element of browser.
jQuery Input Floating Hint Box allows to display a fully-editable hint that floats when a field gets a focus.
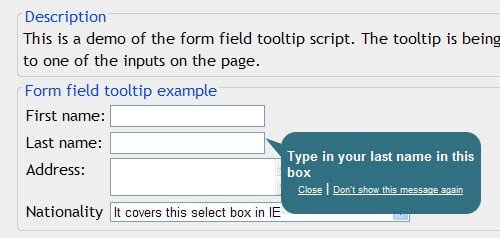
DHTML Goodies Form Field Tooltip makes it possible to display the helper text depending on what's entered in the title attribute of the form field.
***
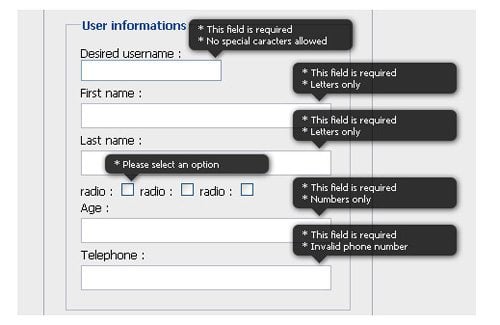
You are free to write your own JavaScript (or use an editable plugin) to present a custom tooltip-style message for some of the confusing form elements explanation or a specific type of input (like a username allowing only letters or numbers and the minimum of 5 characters).
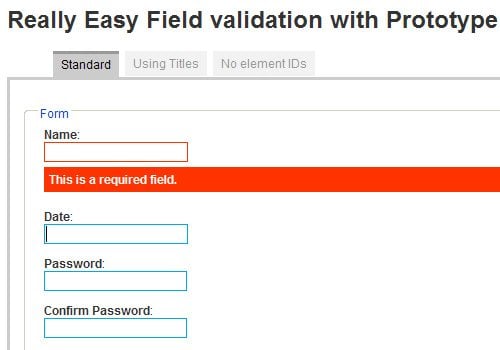
Inline Validation
Dexagogo provides an easy script to be used for adding inline validation on your wesbite. This script uses fade-in effect with Scriptaculous.
Inline Validation Tips are also described in the following step-by-step tutorial - jQuery Inline Form Validation, Because Validation is a Mess. It shows how to implement jQuery to make inline validation for some lengthy form.
Check Form Functionality
And finally, you should make it a regular rule to test your form permanently in various browsers. You should be always sure that after clicking the “submit” button your form actually submits without any error messages. This is the first thing that diverts the clients. Errors make them feel uncomfortable and evoke a strong desire to leave the page irrevocably. Check if the form data are received properly, in the proper format, which makes it easy to utilize them. It'll also highly recommended to validate your CSS and HTML with some validation tool you may get on the net to make your website forms usable and after all efficient.

Helga Weber is an experienced columnist, enthusiastic about web design and digital arts. Find her on Flickr
Get more to your email
Subscribe to our newsletter and access exclusive content and offers available only to MonsterPost subscribers.

Leave a Reply
You must be logged in to post a comment.