Icon Fonts Justified: Pros, Cons & Free Resources
Icon Fonts. Probably you've heard that using icon fonts is very easy and one can do it really quickly? Let’s analyse this design tool, its methodology and use.
First of all, have a look at search queries is Google: "icon font" - 720 requests per month , "download icons" - 1000 requests per month (in US.) The number are really close, but what;s the difference among these two? In this article we'd like to have a look at this mighty design tool from the point of view of designer and coder, and also point out pros and cons of using icon fonts as well as name 'best representatives'.
There is no need to discuss the relevance of the use of icons font in the web, it's quite inviolable. Let’s start with pros and cons of the use of bitmapped icons and icon fonts.
Bitmapped icons
We will not talk about vector icons, since svg support in IE starts from the 9th version, and the 8th one is already gone, almost...
From the designer's perspective
- Quick Search: previewing raster graphics does not require installation of additional software - rather convenient.
- Rapid implementation into the document: just drag the file into your document in Photoshop or Gimp - also convenient.
- Scaled raster graphics is bad: icons cannot be increased without loss of quality - that's bad.
From the viewpoint of an HTML- coder
- Pulling those icons out of the PSD is rather uncomfortable. But when you do it, each icon generates a request to the server. To reduce that load we need to create sprites - glue those small graphic elements into a single image.
- Animating raster icons is easy, but the image quality becomes really bad.
- In mobile devices, while scaling, bitmap icons do not look really good, especially on devices with Retina display.
Icon fonts
In this font, each character is an icon. On the web they are used as follows: you need to connect font files to your page (as any other plugged fonts that have several formats), in CSS you need to add rules with selectors that are relevant to the content of icons, class:
icon-home
, may correspond to the icon "home".
Then, you need to write in HTML:

and your icon home will appear in the place you have chosen. Nothing prevents using pseudo classes instead of extra HTML-elements.
Benefits
- You can scale or animate those icons without problems (icon fonts are vector.)
- Large sets of icons can be used just like that.
- These icons look great on all displays.
- Icons can be easily added to the page (HTML interaction.)
- You can change the color and size using CSS.
- Easy change shadow icons also with the help of CSS3 (not rendered in older versions of IE.)
Drawbacks
- To preview those icons you need to open a web page or run specific software.
- Only one color in the icon.
- A more complicated approach to use them in a graphics editor.
- Without optimization the font may contain lots of unused icons (too large file size.)
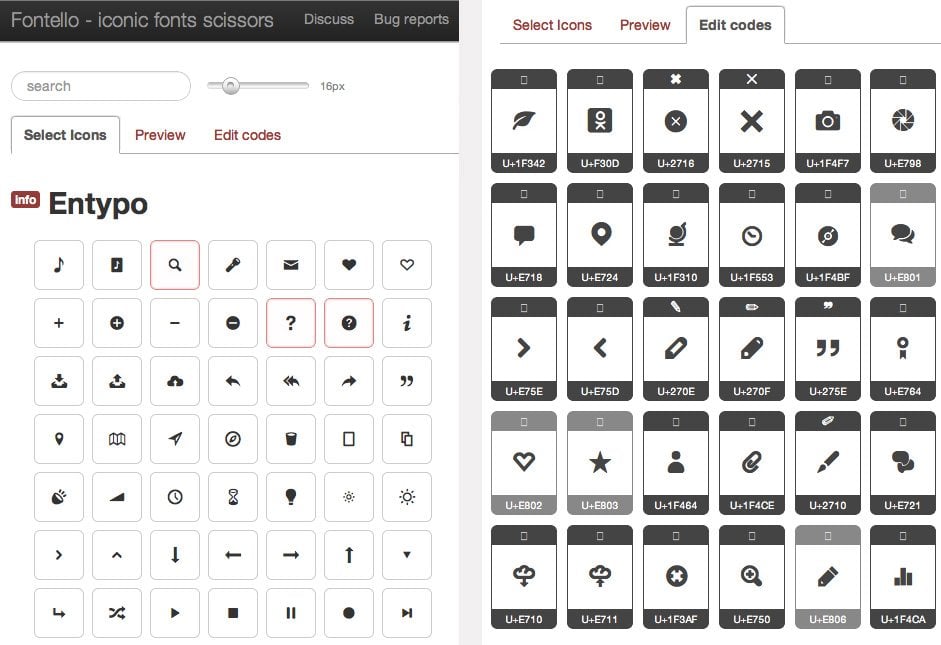
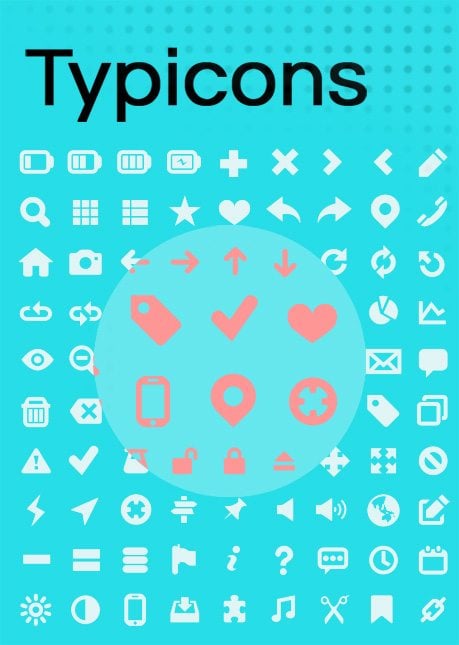
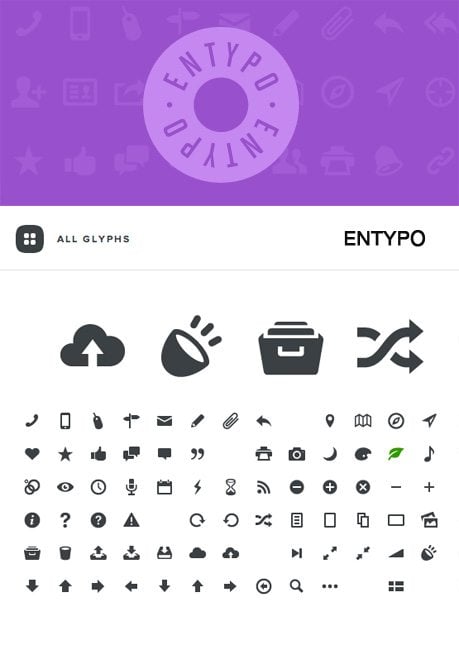
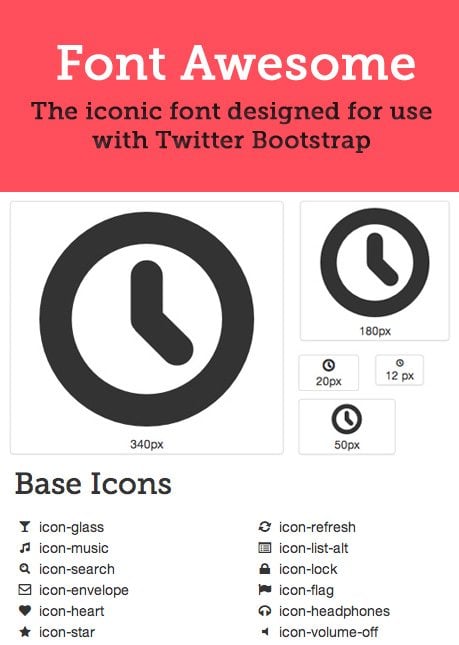
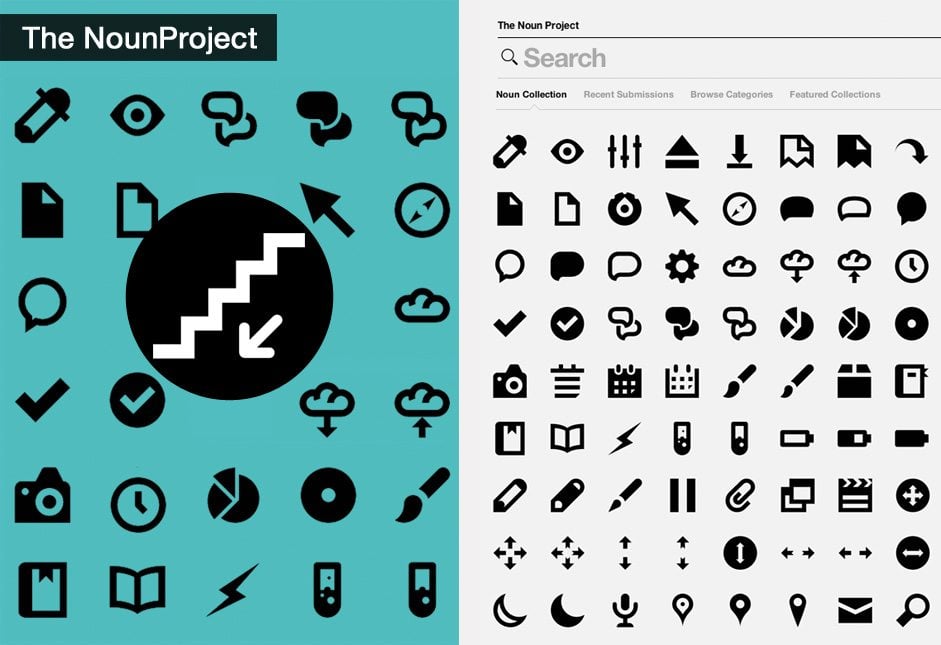
Now let's have a closer look at those icon fonts. Below you will find a number of resources where you can download these design goodies for free.
Each of these resources provides a different set of icons, so you are free to use them all. Depending on your project you will need different set of icons, just choose icons you need and hit the download button.

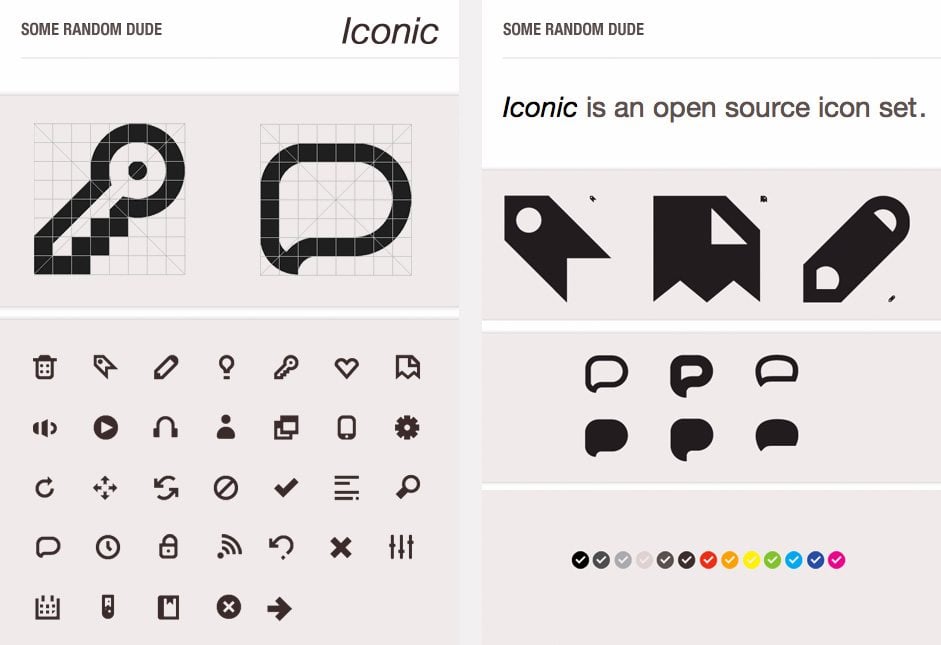
Iconic
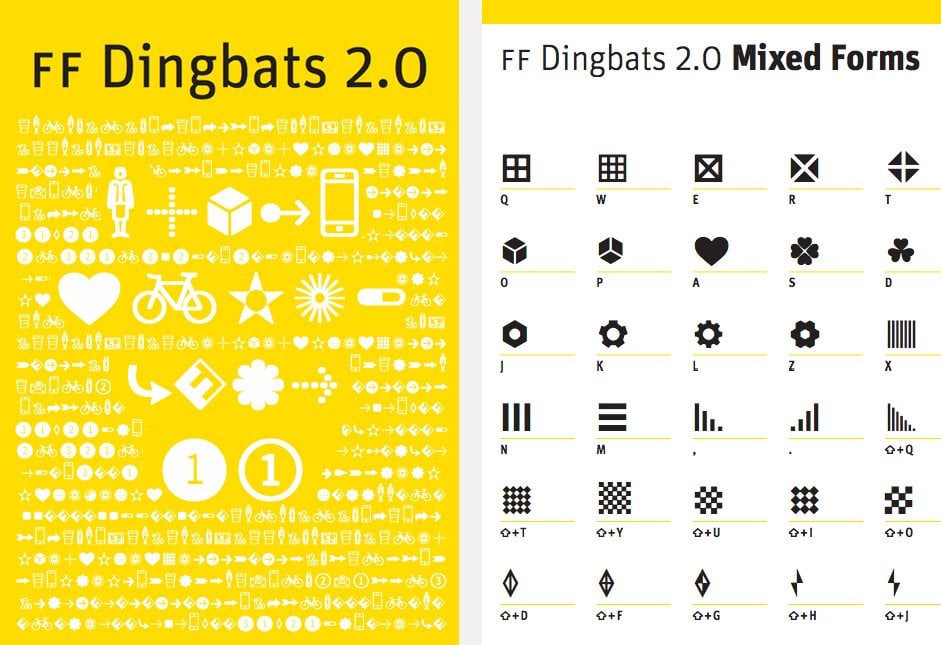
FF Dingbats
Guys, if you have already used icon fonts, you are free to describe your experince in the comments, or just share links to the resources you're using most of all.
How to Create Icon Fonts. Quick Start Guide
Icon fonts are of great use to web designers. Why are these in demand? What makes them better than bitmap icons? What are icon fonts all about? How to create icon fonts? Let’s find it out in this blog post.
Basically, just like working with standard image based icons, using icon fonts you can do various manipulations, like play with color and size, manage shadow, etc. One might wonder there is nothing special about icon fonts, so why use them? Unlike traditional image sprites, these can be easily edited while retaining perfect quality. You can change opacity, rotate, add strokes, gradients, textures or whatever by applying necessary changes to CSS code. To put it clearer, have a look at the image below. Here you can see one of the icon fonts that we will further highlight in this tutorial opposed to the equal PNG image. Both artworks are proportional to each other in terms of width. I guess you can see the difference.

What Are Icon Fonts
Icon fonts are vector graphics that are added to content using CSS content property. Similar to regular fonts, icon fonts are scalable and can be managed using code. This is one of the biggest advantages of the latter over bitmap images. Lightweight and Retina-ready, icon fonts can be styled using CSS, similar to standard texts.
Icon fonts are the best choice from an accessibility point of view since they are scalable and are visible in high contrast on Windows. Bitmap images don’t scale well and lose quality when scaled up or down. Each bitmap image requires http request, which slows down load times of your page. The biggest drawback of the latter is that images can be reworked using an image editor only, unlike icon fonts.
The largest majority of modern web design studios make use of icon fonts in their works. We have decided that it’s high time for you to start applying these to your projects as well. That’s why in our today’s quick start guide to make icon fonts we’ll show you how to convert PNG icons into fonts.
The stuff you’ll need:
- Adobe Illustrator – premium vector graphics editor
- Inkscape – pro quality free vector graphics software
- Fontastic.me – free online service that allows creating icon fonts fast and easy
The things we’ll do:
- Convert .eps icons into .svh format
- Get ready to move .svg icons to fontastic.me
- Group .svg icons into font
- Edit styles and add icon fonts to the project
Converting .eps icons into .svg format
To get started you’ll need a set of icons in .eps source format. We will use the following icons in this icon fonts tutorial.

Open this .eps file using Adobe Illustrator, which you should have preinstalled on your PC.
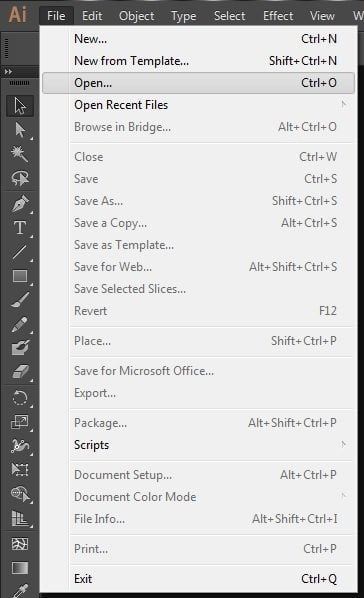
Open layers panel:
[mfc_lightbox]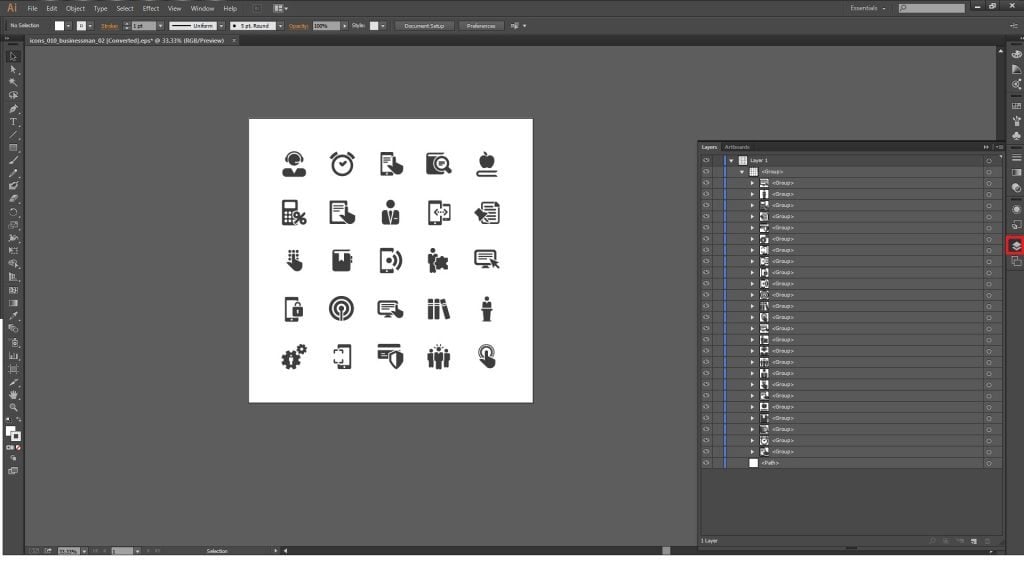 [/mfc_lightbox]
First, let’s check if the Artboard options are properly set. In our case we need to change width and height from 50x50 to 1600x1600. Basically, the size you set doesn’t matter. Just mind there should be enough work area to place all icons.
[mfc_lightbox] [/mfc_lightbox]
Next, remove all background layers. In our example we have only one background layer that was used to oppose icons to pure white hues. Select the layer and delete.
[mfc_lightbox]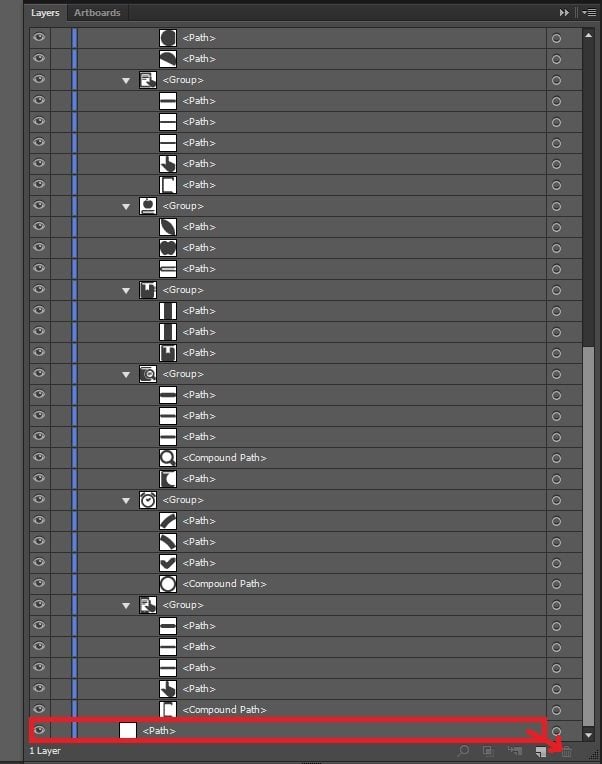 [/mfc_lightbox]
Mind: Sometimes designers create icons as Compounf Clipping Art. In this case removing background layer results in icon transparency since it has neither background nor the stroke color. What should we do in this case?
Select all layers (CTRL+A) and change the fill color for black, stroke color – none. In case you haven’t removed all background layers, you will see it at once since the whole image will be colored black.
[mfc_lightbox]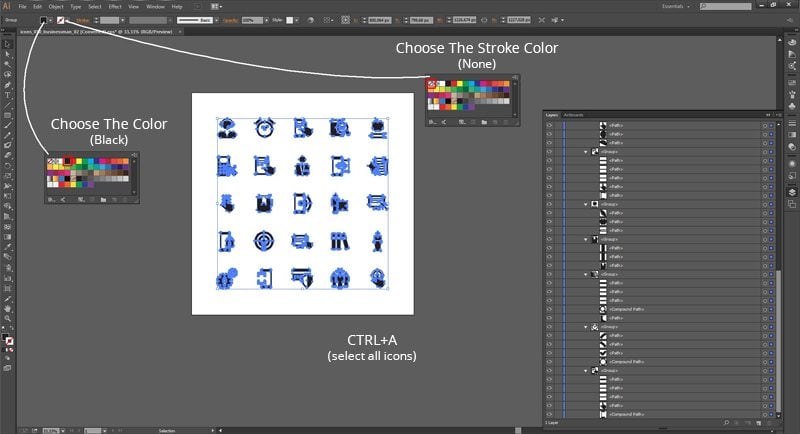 [/mfc_lightbox]
Mind: In case you don’t see color palette when clicking the icons for selecting the fill color and stroke color, try to repeat the same action pressing the SHIFT key.
That’s it at this stage. Save the file with icons in .svg format (CRTL-SHIFT-S or File – Save as…) and let’s move further.
Moving .svg Icons to Fontastic.me
Launch Inkscape and open Source File with .svg icons (File – Open …)
[mfc_lightbox]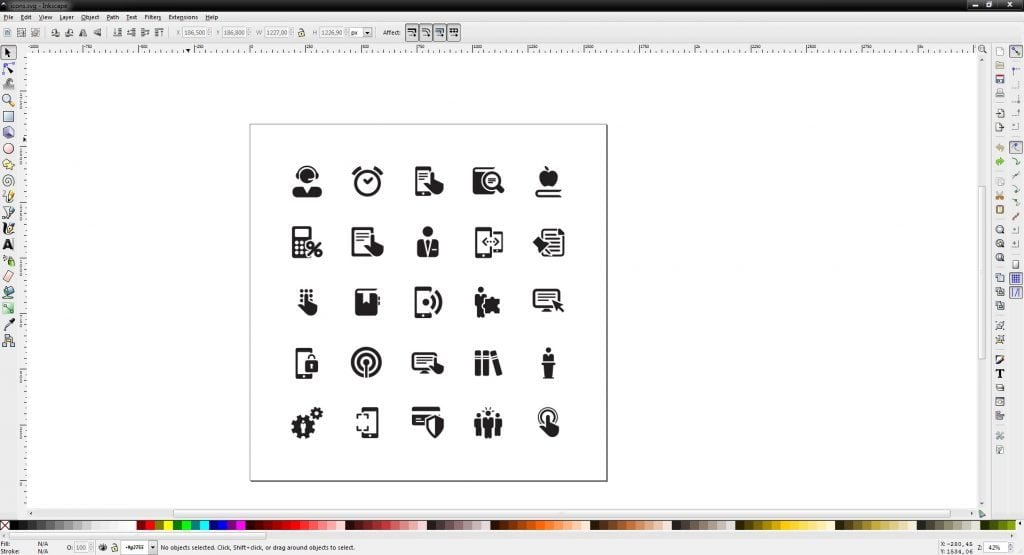 [/mfc_lightbox]
Create new document - “File – New – fontforge_glyph” (let it be Temporary File).
[mfc_lightbox]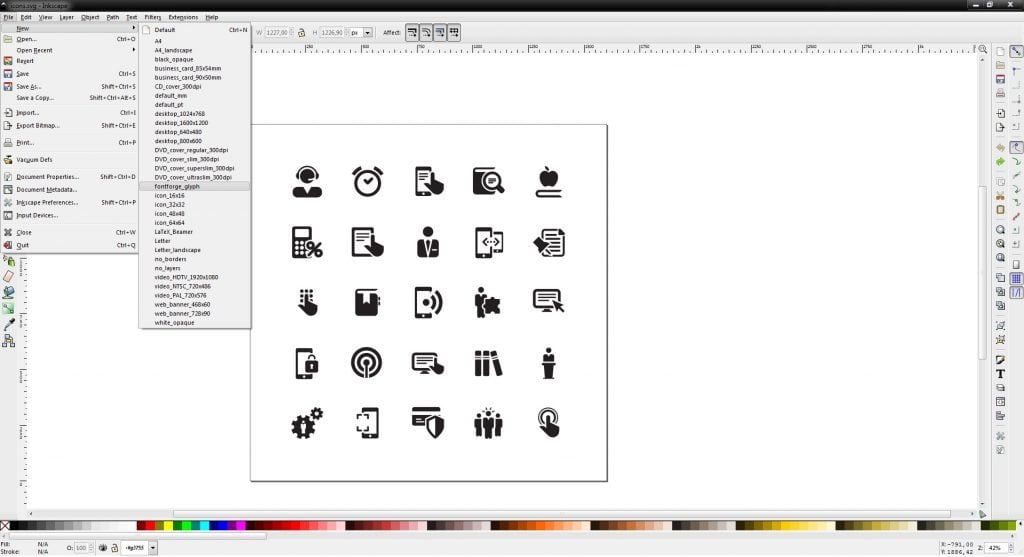 [/mfc_lightbox]
Copy icons from the Source file to Temporary File.
[mfc_lightbox] [/mfc_lightbox]
At this stage, you may close the Source File. Now, select all icons in the Temporary File and scale for one icon to fit the word area.
[mfc_lightbox]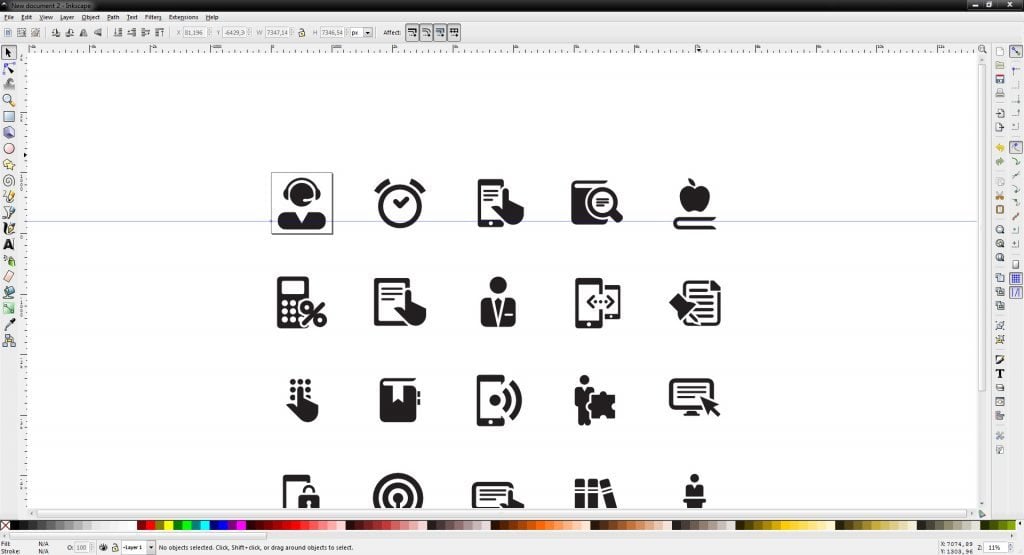 [/mfc_lightbox]
Mind: We need this Temporary File to make all icons proportional to each other, which will further facilitate our work.
Next, create another document “File – New – fontforge_glyph” (Destination File).
[mfc_lightbox]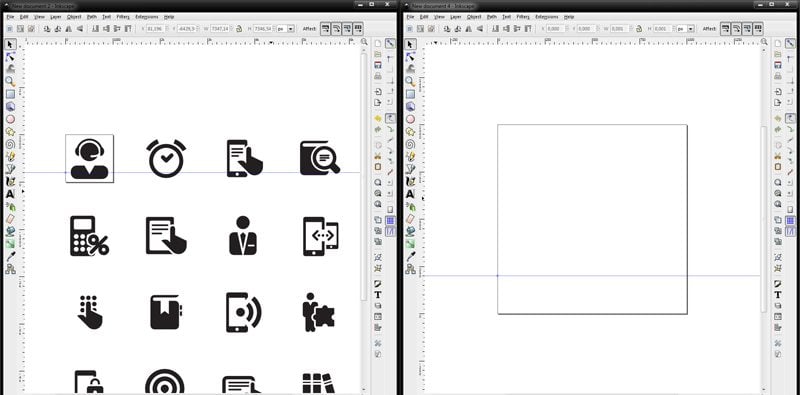 [/mfc_lightbox]
Cut one of the icons from Temporary File (CTRL+X) and paste in the Destination File.
[mfc_lightbox]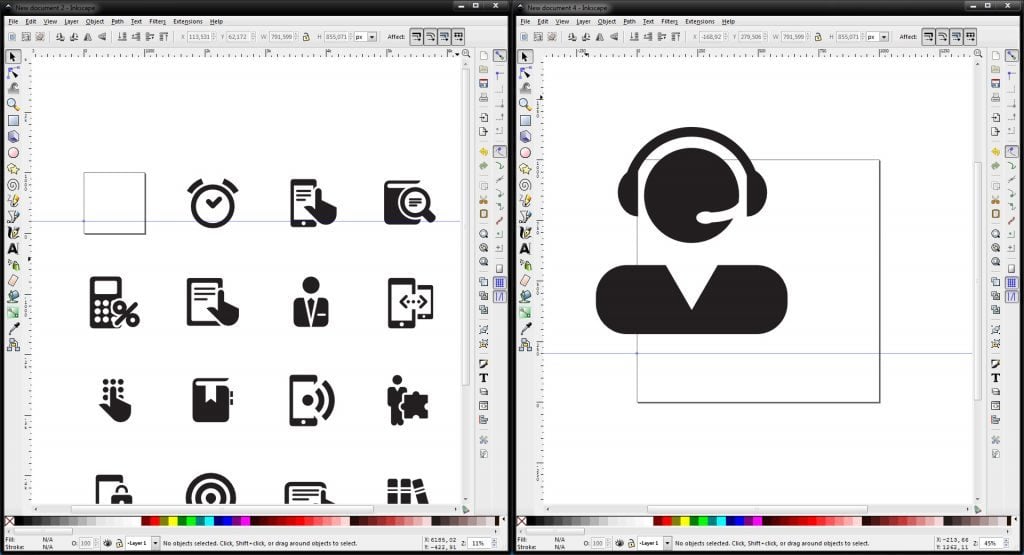 [/mfc_lightbox]
The icon should be center-aligned. To align it to the middle of the page, choose Object – Align and Distribute.
[mfc_lightbox]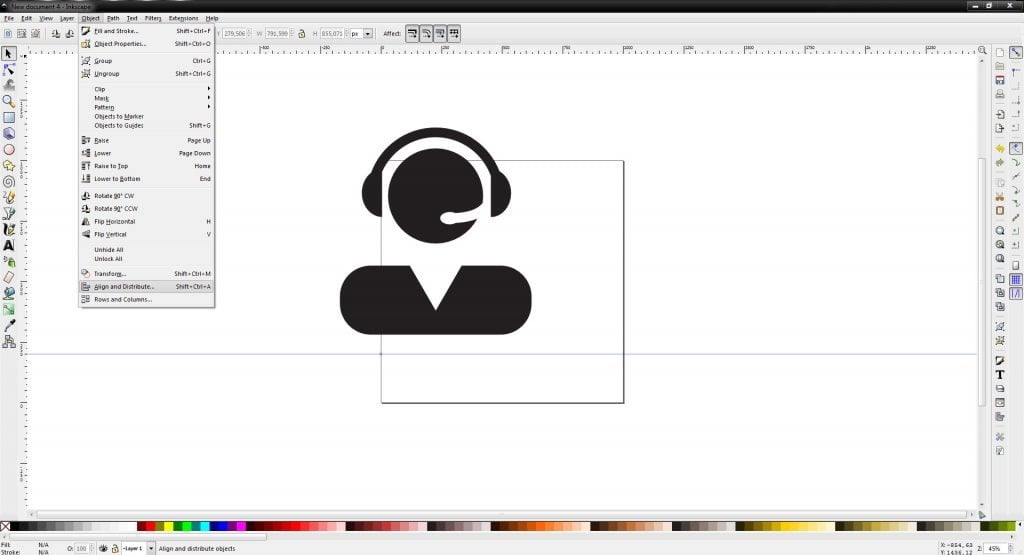 [/mfc_lightbox]
The following panel should appear.
[mfc_lightbox]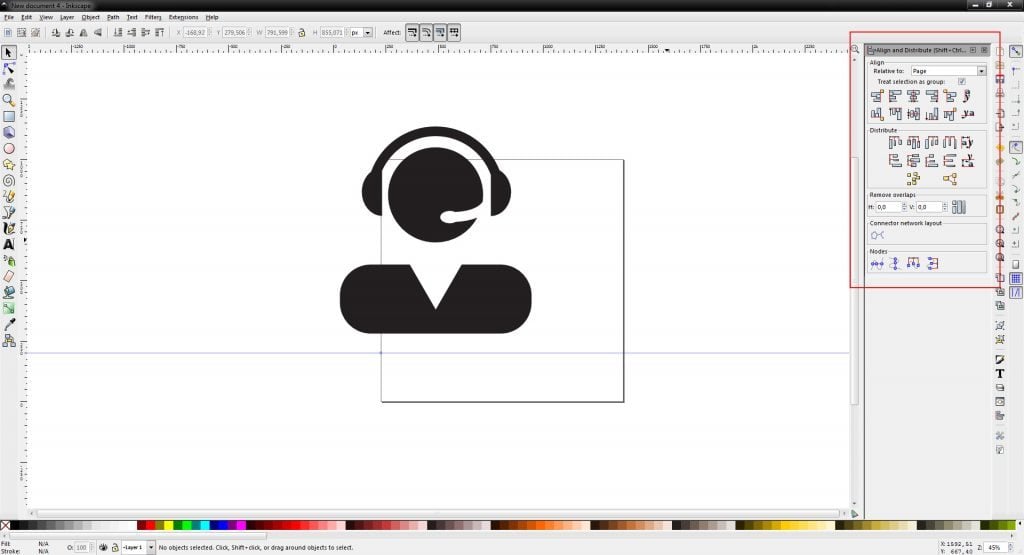 [/mfc_lightbox]
Select the icon and tick “Page” in Relative to menu from Align and Distribute panel. Tick Treat selection as group and click Center on vertical axis and Center on horizontal axis keys.
[mfc_lightbox]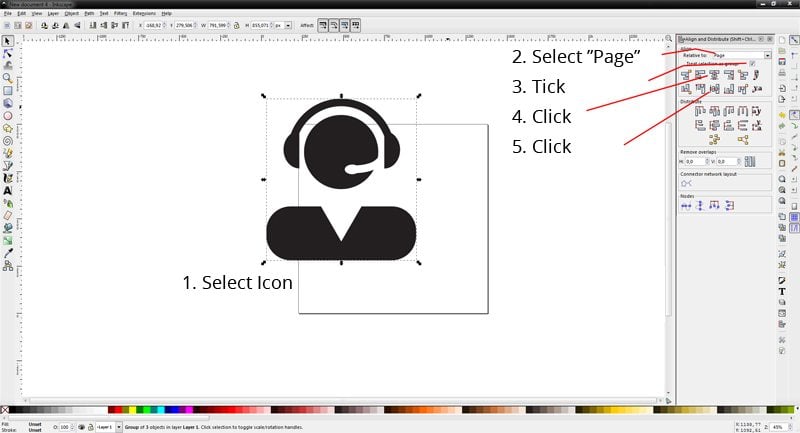 [/mfc_lightbox]
Now the icon is center-aligned.
[mfc_lightbox]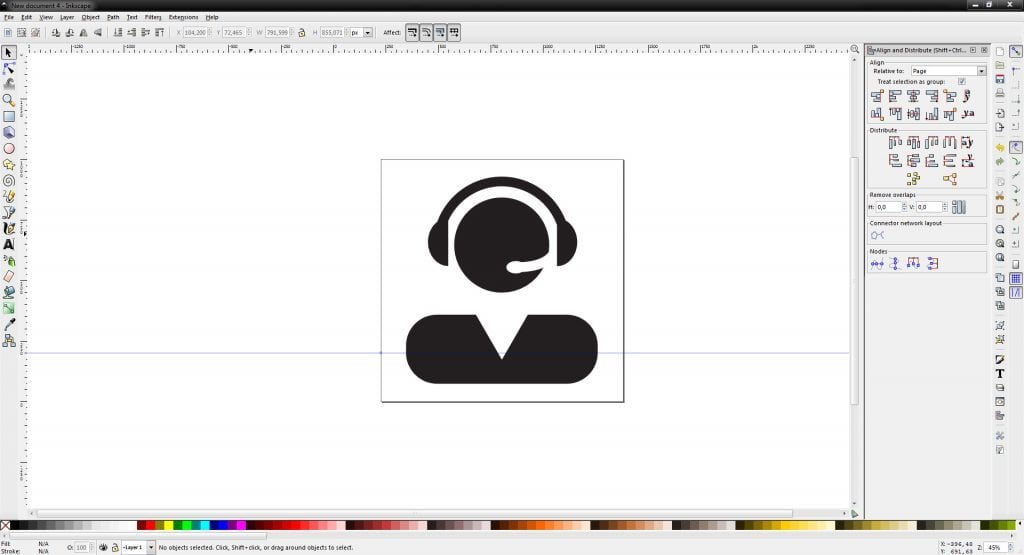 [/mfc_lightbox]
Save Destination File as Plain SVG (File – Save as…).
By way of analogy, apply the same actions to the rest of the icons from the Source File. As a result, you should get a set of 25 .svg files. That’s it for Inkscape. Let’s move to the next step.
Creating Font from .svg icons
Launch any browser you commonly use and go to Fontastic.me page. Log in to your account and you’ll see an app for creating icon fonts.
[mfc_lightbox]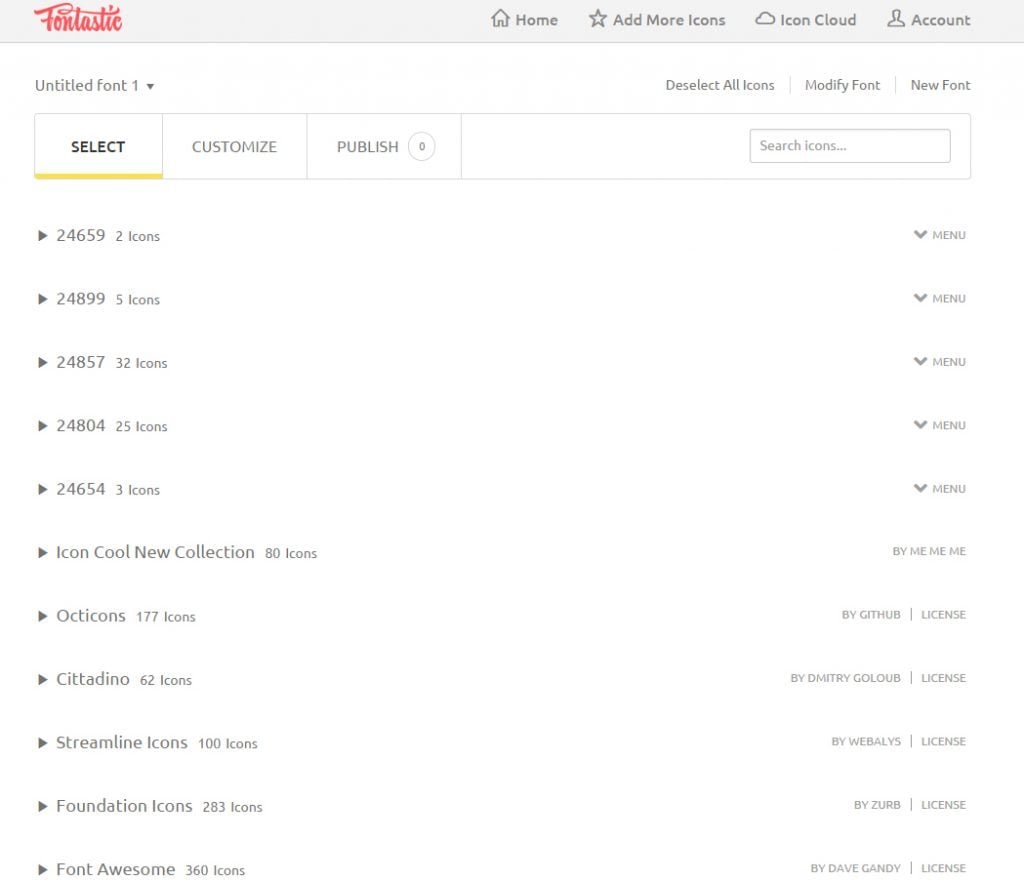 [/mfc_lightbox]
Click Add More Icons
[mfc_lightbox]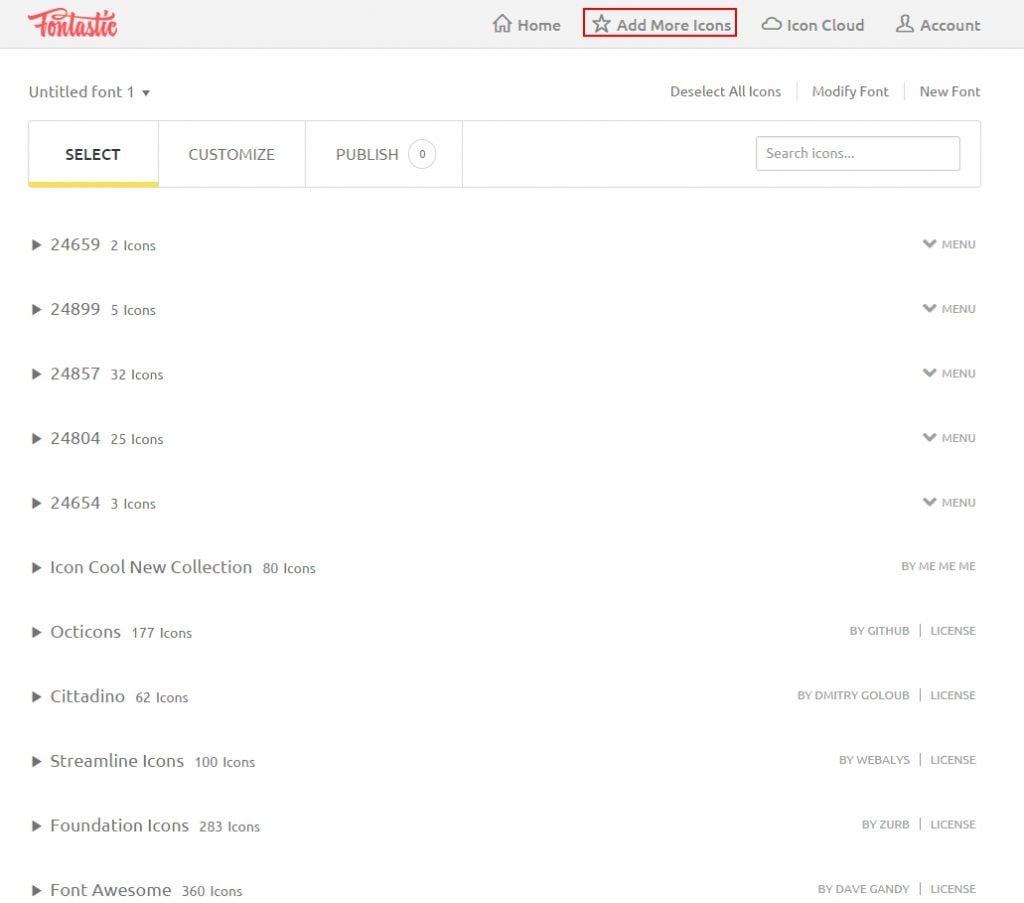 [/mfc_lightbox]
Next press IMPORT ICONS key.
[mfc_lightbox]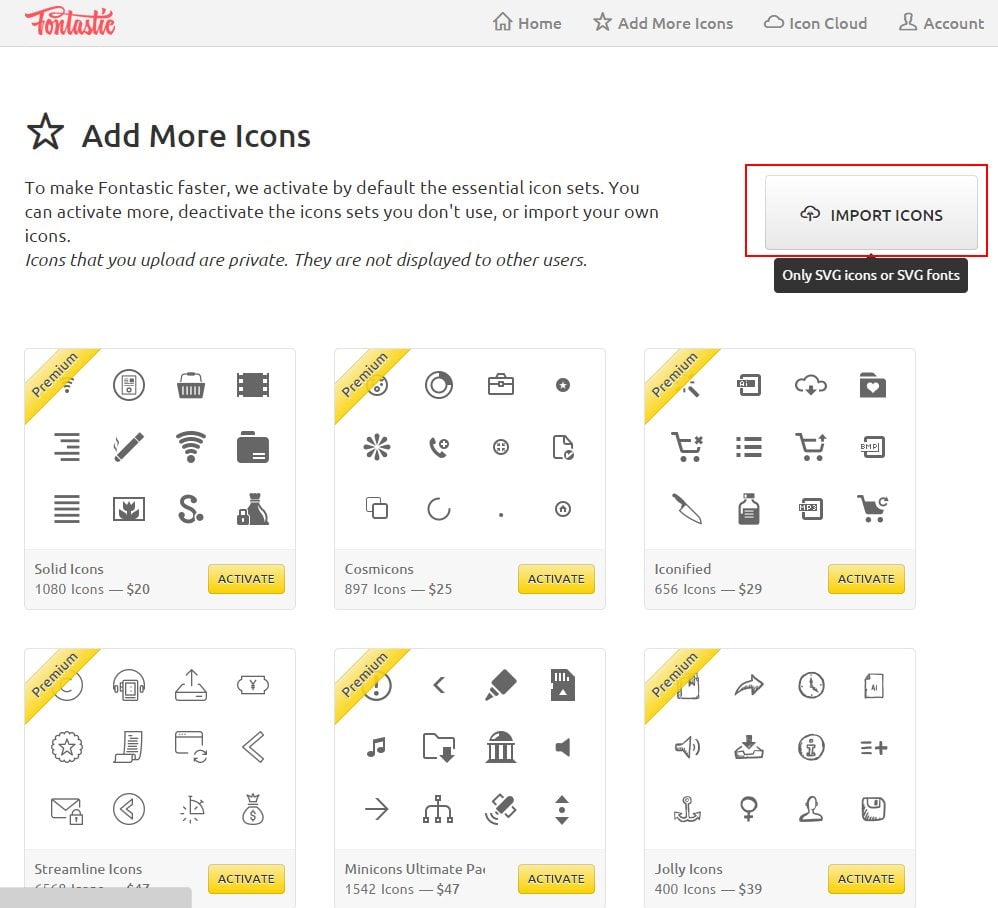 [/mfc_lightbox]
Select all 25 .svg icons and click Open. Wait till all icons are uploaded. On an average, it takes less than a second. In case an error occurs during the upload, most likely you made some mistakes during the aforementioned stages. It often happens that designers select the wrong file format when saving icons (e.g. Inkscape SVG instead of .svg).
[mfc_lightbox]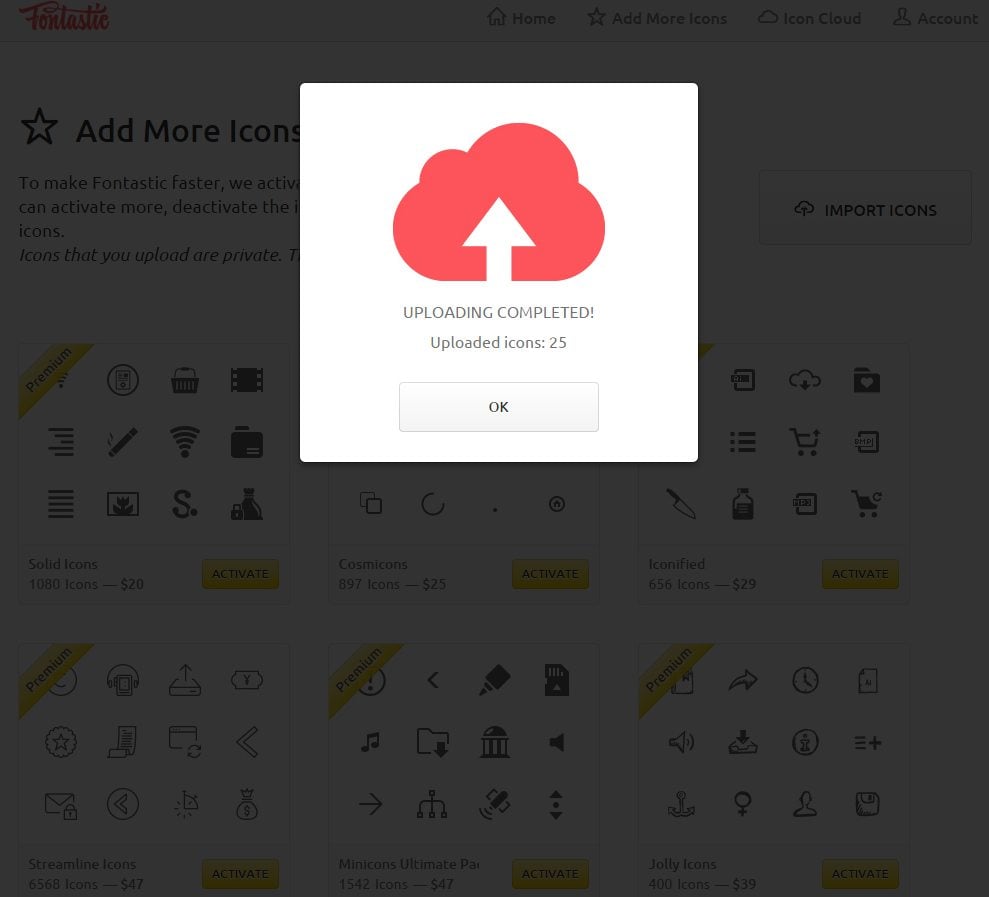 [/mfc_lightbox]
Press OK and get back to Fontastic home page. The uploaded icons are stored here. In case you see black fields instead of some icons, most likely you have forgotten to delete backgrounds of those icons at the stage 1 “Converting .eps icons into .svg format” .
Now, mark select icons for the font.
[mfc_lightbox]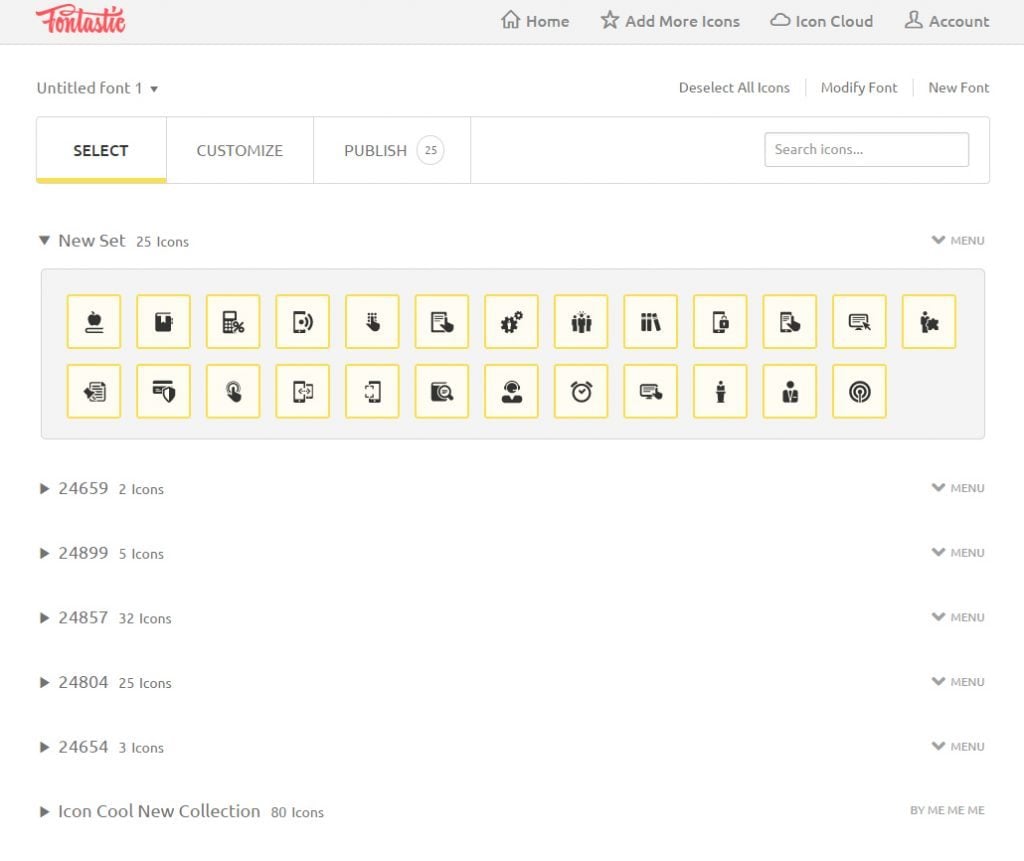 [/mfc_lightbox]
Press “Modify Font”
[mfc_lightbox]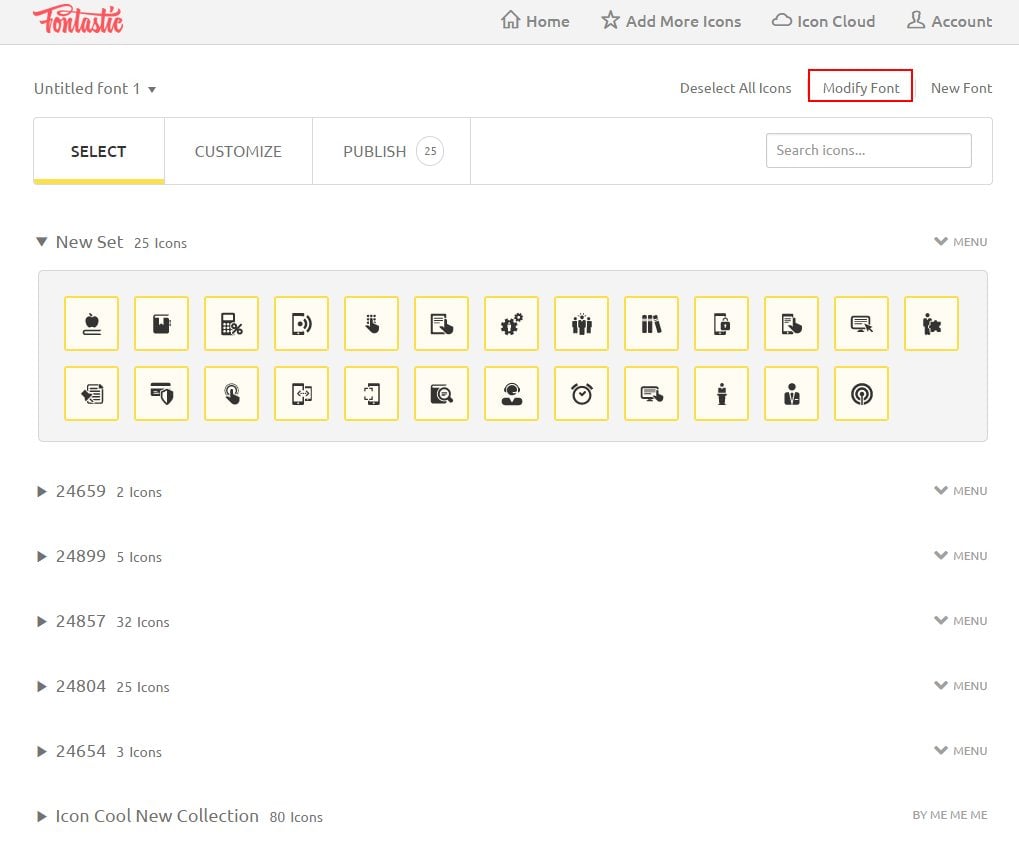 [/mfc_lightbox]
Enter font name and CSS Class Prefix. Click Save.
[mfc_lightbox]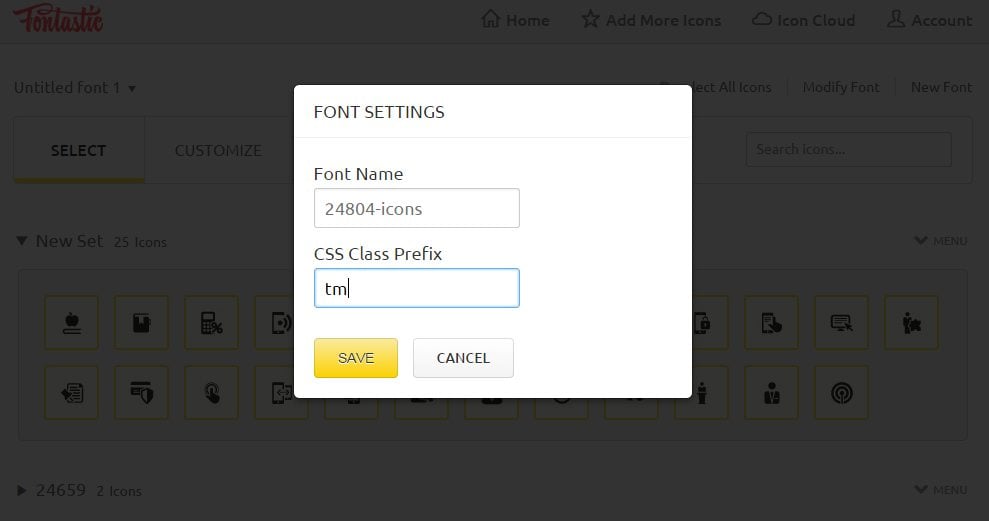 [/mfc_lightbox]
Press Customize key. Here you can enter name for every icon as well as set code for them.
[mfc_lightbox]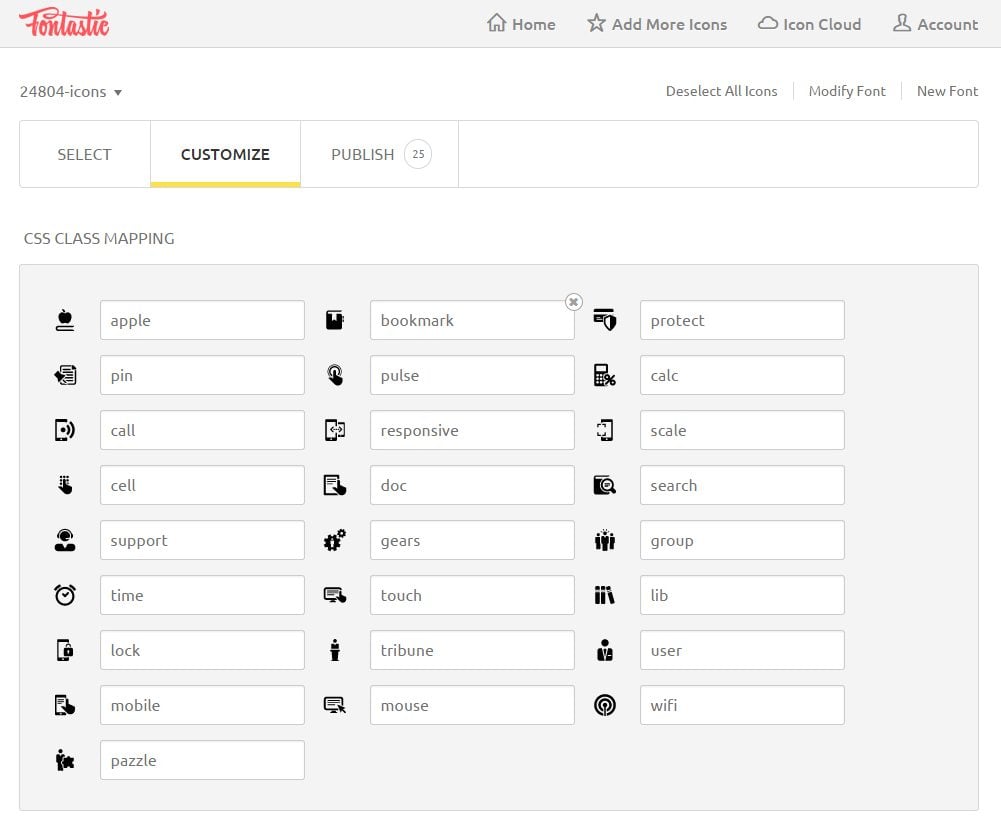 [/mfc_lightbox]
Click Publish, Download, and move to the next stage.
Managing Styles & Adding Icons
Extract files from the archive and copy to fonts folder of your project. Don’t forget to copy styles.css file as well. For instance, you may copy fonts folder to site folder of your project, and styles.css to css folder.
Open styles in any text editor. Here you need to locate the icon fonts and remove odd styles.
@charset "UTF-8"; /* Remove, UTF-8 is written in HTML */
@font-face {
    font-family: "24804-icons";
    src:url("fonts/24804-icons.eot"); /* Here we indicate fonts path */
    src:url("fonts/24804-icons.eot?#iefix") format("embedded-opentype"),
        url("fonts/24804-icons.woff") format("woff"),
        url("fonts/24804-icons.ttf") format("truetype"),
        url("fonts/24804-icons.svg#24804-icons") format("svg");
    font-weight: normal;
    font-style: normal;
}
/* This section can be removed as unnecessary */
[data-icon]:before {
    font-family: "24804-icons" !important;
    content: attr(data-icon);
    font-style: normal !important;
    font-weight: normal !important;
    font-variant: normal !important;
    text-transform: none !important;
    speak: none;
    line-height: 1;
    -webkit-font-smoothing: antialiased;
    -moz-osx-font-smoothing: grayscale;
}
/* ========================================== */
[class^="tm-"]:before,
[class*=" tm-"]:before {
    font-family: "24804-icons" !important;
    font-style: normal !important;
    font-weight: normal !important;
    font-variant: normal !important;
    text-transform: none !important;
    speak: none;
    line-height: 1;
    -webkit-font-smoothing: antialiased;
    -moz-osx-font-smoothing: grayscale;
}
.tm-apple:before {
    content: "\e000";
}
.tm-bookmark:before {
    content: "\e001";
}
.tm-protect:before {
    content: "\e002";
}
.tm-pin:before {
    content: "\e003";
}
.tm-pulse:before {
    content: "\e004";
}
.tm-calc:before {
    content: "\e005";
}
.tm-call:before {
    content: "\e006";
}
.tm-responsive:before {
    content: "\e007";
}
.tm-scale:before {
    content: "\e008";
}
.tm-cell:before {
    content: "\e009";
}
.tm-doc:before {
    content: "\e00a";
}
.tm-search:before {
    content: "\e00b";
}
.tm-support:before {
    content: "\e00c";
}
.tm-gears:before {
    content: "\e00d";
}
.tm-group:before {
    content: "\e00e";
}
.tm-time:before {
    content: "\e00f";
}
.tm-touch:before {
    content: "\e010";
}
.tm-lib:before {
    content: "\e011";
}
.tm-lock:before {
    content: "\e012";
}
.tm-tribune:before {
    content: "\e013";
}
.tm-user:before {
    content: "\e014";
}
.tm-mobile:before {
    content: "\e015";
}
.tm-mouse:before {
    content: "\e016";
}
.tm-wifi:before {
    content: "\e017";
}
.tm-pazzle:before {
    content: "\e018";
}
After applying necessary changes to the source file, here’s what you’ll get:
@font-face {
    font-family: "24804-icons";
    src:url("../fonts/24804-icons.eot");
    src:url("../fonts/24804-icons.eot?#iefix") format("embedded-opentype"),
        url("../fonts/24804-icons.woff") format("woff"),
        url("../fonts/24804-icons.ttf") format("truetype"),
        url("../fonts/24804-icons.svg#24804-icons") format("svg");
    font-weight: normal;
    font-style: normal;
}
[class^="tm-"]:before,
[class*=" tm-"]:before {
    font-family: "24804-icons" !important;
    font-style: normal !important;
    font-weight: normal !important;
    font-variant: normal !important;
    text-transform: none !important;
    speak: none;
    line-height: 1;
    -webkit-font-smoothing: antialiased;
    -moz-osx-font-smoothing: grayscale;
}
.tm-apple:before {
    content: "\e000";
}
.tm-bookmark:before {
    content: "\e001";
}
.tm-protect:before {
    content: "\e002";
}
.tm-pin:before {
    content: "\e003";
}
.tm-pulse:before {
    content: "\e004";
}
.tm-calc:before {
    content: "\e005";
}
.tm-call:before {
    content: "\e006";
}
.tm-responsive:before {
    content: "\e007";
}
.tm-scale:before {
    content: "\e008";
}
.tm-cell:before {
    content: "\e009";
}
.tm-doc:before {
    content: "\e00a";
}
.tm-search:before {
    content: "\e00b";
}
.tm-support:before {
    content: "\e00c";
}
.tm-gears:before {
    content: "\e00d";
}
.tm-group:before {
    content: "\e00e";
}
.tm-time:before {
    content: "\e00f";
}
.tm-touch:before {
    content: "\e010";
}
.tm-lib:before {
    content: "\e011";
}
.tm-lock:before {
    content: "\e012";
}
.tm-tribune:before {
    content: "\e013";
}
.tm-user:before {
    content: "\e014";
}
.tm-mobile:before {
    content: "\e015";
}
.tm-mouse:before {
    content: "\e016";
}
.tm-wifi:before {
    content: "\e017";
}
.tm-pazzle:before {
    content: "\e018";
}
Now all that remains is adding icon styles file to style.css and icon to html.
/* file style.css */
...
@import 'tm-icons.css'
...
/* file *.html */
...
<span class='tm-protect'></span>
...
How to Deliver Messages Aesthetically and Fast with Icon Fonts
There’s an overused old adage: a picture speaks a thousand words. No matter how old and how many times it has been used, this still holds true. Especially in the world of web design. Try to convey something through text, you might get an average response. Learn how to deliver messages with icon fonts.
The results are sure to be amazing. This is why a large number of designers prefer the emerging trend of fonts – the icon fonts. These are just fonts and nothing else, but with a bit of twist. Instead of letters and numbers, these fonts contain glyphs and symbols, which make it easier for the viewers to understand what this font conveys the moment they see it.
Icon Fonts Benefits
Why are icon fonts amazing for your web designing endeavors? Why to choose icon fonts? There are quite a few reasons for it.
- Conveys the message fast through crisp and clear images.
- Their size can be changed.
- Their colors can be altered.
- Drop shadows can be added.
- Can be given a customized appearance.
- Can help to speed up page load time.
Conveys the Message Fast through Images
An image is always a better way of conveying some kind of message to your target audience. It is going to be short and crisp. And in this age when almost no one has any time to spare, the messages are going to help them grasp the idea within seconds. This ensures that the people immediately have the idea about what you want to say. This is likely to help significantly in reducing the bounce rate, as the pages are also going to be quite attractive with the use of the icons.
Easy to Change Size
The size of the web pages usually varies according to the amount of content present there. Depending on this size, the icons on the web page needs to be resized. This size will also express the importance of the icons on the page. If you had to use images for the same, you would need Photoshop or some other photo editing software to change the size. With icon fonts, however, you won’t need any of them. Their sizes can be altered within a short time.
Colors Can Be Altered
Use images for your web page. And the moment you want to apply any changes to it, you would need the help of image editing software. That’s not an easy task at all. And neither a fast one. With the help of icon fonts, this can be done in seconds. All you need to do is calibrate the shade of the icon. And it will appear in the right color for your web page. You can also add text strokes to it, or even textures and gradients to these fonts, thus giving them an amazing look.
Possible to Add Drop Shadow
Use any simple image or text in place of icons for your web page. The extent of designing you can render there will be limited. On the other hand, if you go for an icon font, you can easily transform it the way you wish. In addition to playing with the size and the shades, you can also add a bit of drop shadow to the icons. This is likely to give it a touch of 3D and thus, make it more attractive for the viewers.
Give a Customized Appearance to the Fonts
One of the most amazing advantages of using icon fonts is that they can be altered just the way you want them to. Thus, you can give them almost a customized appearance. You can rotate the fonts as you wish. You can also play with its opacity, thus changing the way it looks. Being vector components, these fonts are usually quite smooth and hence appear pleasant to the eyes. This enhances the aesthetic appeal of the fonts and, in turn, of the whole web page.
Speed up the Page Load Time
One of the most important things while planning the design of a web page is the page load time. If you are using too heavy page elements, your web page is sure to take a lot of time to load. For example, if you have a web page, it is obvious that you will need images there. Images are usually heavy and take a lot of time to load.
Fonts, on the other hand, are lighter and ensure that your web page loads faster. Hence, you can always use icon fonts to ensure that your website loads faster. And it’s always a great idea to use icon fonts at such places. They will offer you the effects of images, without making the pages heavy. It has been noticed that icon fonts help to speed up page load time by 14%.
With every passing day, the popularity of icon fonts is increasing significantly. These are being considered as a major addition to the field of web design and are likely to rule the roost in near future as well. They are going to play a major role in ensuring that you can connect with your audience fast and in a perfectly aesthetic manner.
Don’t miss out these all-time favourites
- The best hosting for a WordPress website. Tap our link to get the best price on the market with 82% off. If HostPapa didn’t impress you check out other alternatives.
- Website Installation service - to get your template up and running within just 6 hours without hassle. No minute is wasted and the work is going.
- ONE Membership - to download unlimited number of WordPress themes, plugins, ppt and other products within one license. Since bigger is always better.
- Ready-to-Use Website service is the ultimate solution that includes full template installation & configuration, content integration, implementation of must-have plugins, security features and Extended on-page SEO optimization. A team of developers will do all the work for you.
- Must-Have WordPress Plugins - to get the most essential plugins for your website in one bundle. All plugins will be installed, activated and checked for proper functioning.
- Finest Stock Images for Websites - to create amazing visuals. You’ll get access to Depositphotos.com to choose 15 images with unlimited topic and size selection.
- SSL Certificate Creation service - to get the absolute trust of your website visitors. Comodo Certificate is the most reliable https protocol that ensures users data safety against cyber attacks.
- Website speed optimization service - to increase UX of your site and get a better Google PageSpeed score.

Get more to your email
Subscribe to our newsletter and access exclusive content and offers available only to MonsterPost subscribers.

Leave a Reply
You must be logged in to post a comment.