Did you visit our Twitter Page? Then I guess you've noticed that it looks different and demonstrates you the process of templates creation. Of course, it's just a metaphorical explanation, the development process itself demands lots of craft and patience. Still the cover can show you what is to be done in order to please you with new website templates in such a bright and unusual manner.
If you liked our cover idea or just want to continue your Photoshop study I advise you to take a closer look how this TemplateMonster plant was created by means of Photoshop.
1. First of all create a new document 1500x500 px. The background color is #f1f9fc.

* * *
2. Now using color #5b5757 and Ellipse Tool (U) draw an oval.

* * *

3. Duplicate it (right click the layer thumbnail and choose Duplicate Layer) and change the color into #8ddab9 (Alt+Backspace). Place the layer with the gray oval over the layer with the green oval. And now with a right click create clipping mask.

* * *
4. Using Rectangle Tool draw the rest of the tank. That is the result we have.

* * *
5. It’s time to draw the pipe. We’ll do it with the Ellipse Tool (15px), drawing every part of the pipe and just putting them next to each other. The end of the pipe is created with the help of the Rectangle Tool.

* * *

* * *

* * *

* * *

* * *

* * *
6. Take Rectangle Tool and enrich the pipe with taps and connectors.

* * *
7. Now let’s add some plash. The same Rectangle Tool, color #ffffff, opacity 73%

* * *
8. Using Pen Tool we will draw a blue triangle.

* * *
9. Duplicate the layer and flip it horizontal.

* * *
10. Repeat the steps 7-8 two times.

* * *
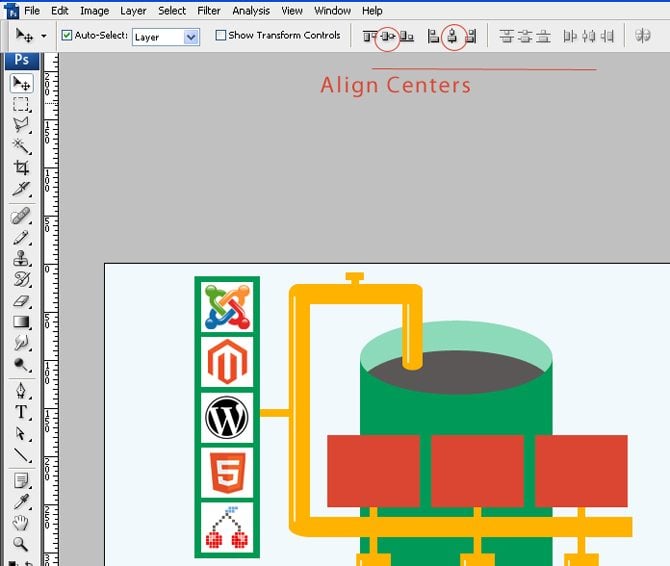
11. I offer you to add the logos of the platforms. In order to place them properly align horizontal and vertical centers.

* * *
* * *
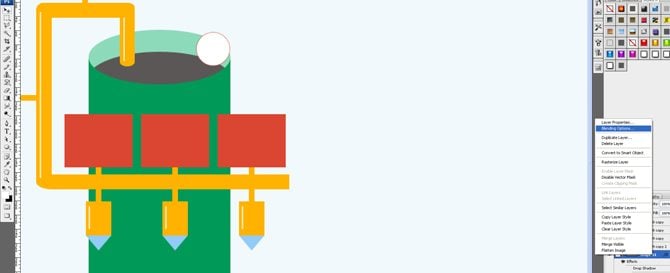
12. Let’s fill our tank with the icons which we usually use for a website design. Draw a circle with the Ellipse Tool.

* * *
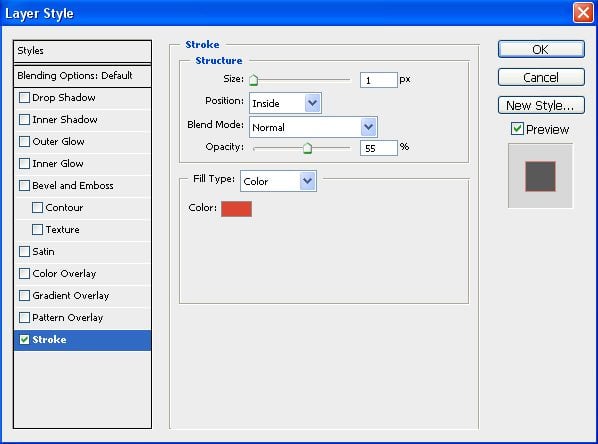
13. Go to Blending options (right click on the thumbnail) - Stroke - Inside - 1px - color #db4632 - opacity - 55%
* * *
* * *
14. Duplicate the layer 6 times. Use following colors for the stroke: #ffb301, #009a57, #7dacf5

* * *
15. Download Font Awesome and take all the necessary icons (don’t forget that it’s a font and you need to resize and modify it as a font). Align centers to place icons in the center of the circle.

* * *
16. With the help of the Rectangle Tool draw a grey rectangle.

* * *
17. Duplicate it.

* * *
18. Take the Pen Tool (P) and draw the collar.

* * *
19. Choose Line Tool (5px) and draw the spring.

* * *

* * *
20. Duplicate the lines and flip them horizontal

* * *
21. Add two circles to the ends of the spring (Eclipse Tool)

* * *
22. Now draw a blue triangle using Pen Tool (P) and duplicate it three times

* * *
23. Take the Rectangle Tool and draw one more rectangle, place the layer under the layer with the collar.

* * *
24. Draw three big blue ovals (Eclipse Tool) and three small blue ovals. Modify your blue rectangle in such a way that there are no white spaces between blue elements (CTRL+T, Keep CTRL and turn your rectangle into trapezium).

* * *

* * *

* * *
Ok guys this was just the first part of our Photoshop tutorial. In a couple of days we'll publish the finishing steps. Be patient and have a great day.

Ivy is a creative writer and experienced web designer at TemplateMonster. You can find a lot of awesome templates in the TemplateMonster inventory. Follow her latest updates on Twitter.
Get more to your email
Subscribe to our newsletter and access exclusive content and offers available only to MonsterPost subscribers.

Leave a Reply
You must be logged in to post a comment.