Hi guys. Are you ready to continue your Photoshop Studies? In our previous Photoshop Tutorial we started to design the Twitter Cover. Today we are going to continue the task and learn some more useful tricks. I think the most complicated steps are already done and today we will manage to reach the goal quite easy just practising the skills and modifying them in accordance of the design needs.
To let you know how the cover will look in the end here is a final result look.

Download PSD
I hope you've succeeded with previous steps and are eager to go further.Then let's start right away.
25. First of all we need to draw a yellow circle (Rectangle Tool) and two triangles (Pen Tool). Add a rectangle between the triangles and you will get the vase.

* * *


* * *

* * *
26. Now we will add some plash, this time Pen Tool, color #ffffff, opacity 73%.

* * *
27. And one more step where we use Pen Tool, we will draw final waves of the liquid.

* * *
28. Let the liquid shine. The form of little starts you can find here. Choose the most appropriate one.

* * *
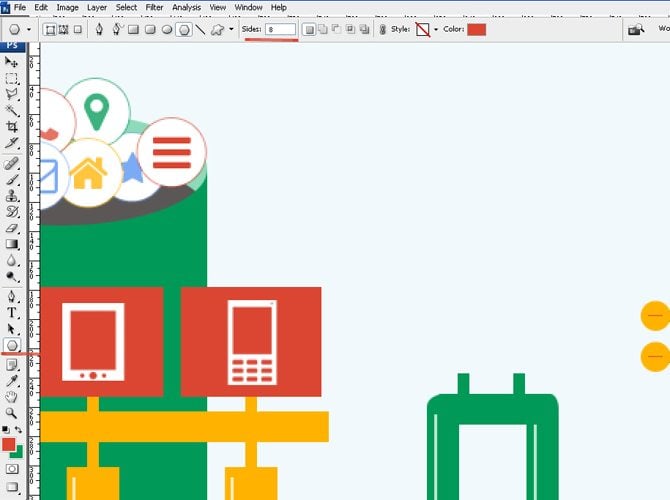
29. The icons which symbolize responsive design you can find here. Download them and place over the red rectangles.

* * *
30. Repeat the Step 5 to draw the rest of the pipes.

31. And the Step 6 to add some plash.

* * *
32. Using Rectangle Tool to draw the final blocks of our factory.

* * *
33. Now choose Pen Tool and draw the yellow trapezium.

* * *
34. Duplicate it and flip horizontal.

* * *
35. Draw a circle and place the Twitter icon (Font-Awesome). Don't forget to align horizontal and vertical centers.

* * *
36. Then draw the pipe connectors, tap and plash - Rectangle Tool, Ellipse Tool, Line Tool (1 px).

* * *
37. We need one more pipe connector which we will make by means of Polygon Tool (8 sides).
* * *

* * *
38. Final touches of the connector we do using Polygon Tool and Line Tool (1 px).

* * *
39. It's time to draw two rectangles (Polygon Tool) and add several star shapes. That is our result for the moment.

* * *
40. Now we will take the Line Tool (50 px) and draw the red ribbon, place it in the middle of the blue rectangle and with a right click create clipping mask. Add the text (OpenSans 30 px).

* * *
41. Take Rounded Rectangle Tool (10 px) and draw a grey rectangle.

* * *
42. With the help of the Rectangle Tool draw a white rectangle and create clipping mask.

* * *
43. Draw three circles (Ellipse Tool) and write (Dosis 30px).

* * *
44. Take Rounded Rectangle Tool (130 px) and draw three shapes (white, black, white). Place the layers one over the other.

* * *

45. Now we need the icon of gear (Font-Awesome). Duplicate it 4 times.

* * *
46. Using Rectangle Tool draw a rectangle and duplicate it 2 times.

* * *
47. The last step - we need only to place screenshots of the templates (clipping mask) and our logo.
* * *
That's it! The work was not a simple one with lots of countless details and forms. But finally we have our cover and being aware of the main principle of such work you can now realize your own ideas with ease. You are welcome to share your results or the works you designed thanks to the tutorial. My best wishes to all your beginning.
Download PSD

Ivy is a creative writer and experienced web designer at TemplateMonster. You can find a lot of awesome templates in the TemplateMonster inventory. Follow her latest updates on Twitter.
Get more to your email
Subscribe to our newsletter and access exclusive content and offers available only to MonsterPost subscribers.

Leave a Reply
You must be logged in to post a comment.